This support guide explains the functionality and how to use the All Companies section of the Reputation Management module.
Step by Step Guide
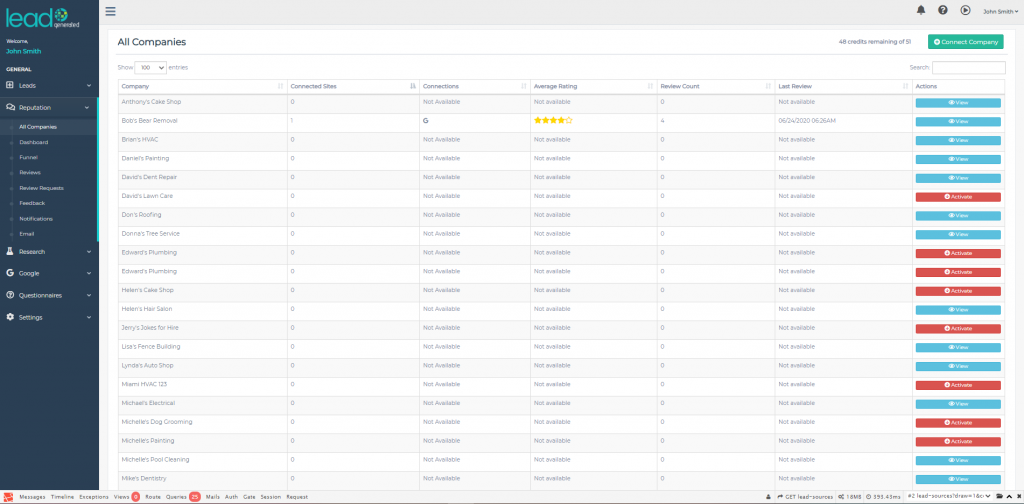
To access this section, click on the Reputation Module header in the left hand navigational menu. This will then expand the module and display all the sections available to you. The very first one is "All Companies", click on this and the system will then display the list of all activated companies that you have created.
If the company you want to use is not listed, make sure you have set it up correctly by following the Add New Company support guide.
Connecting a Google Account
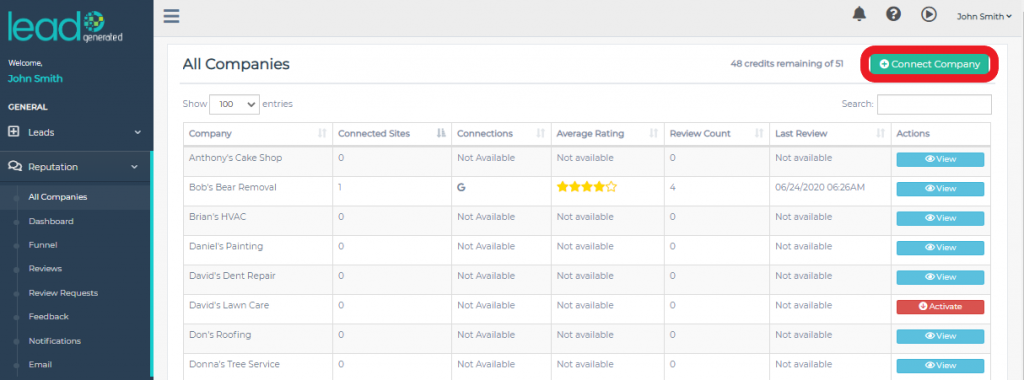
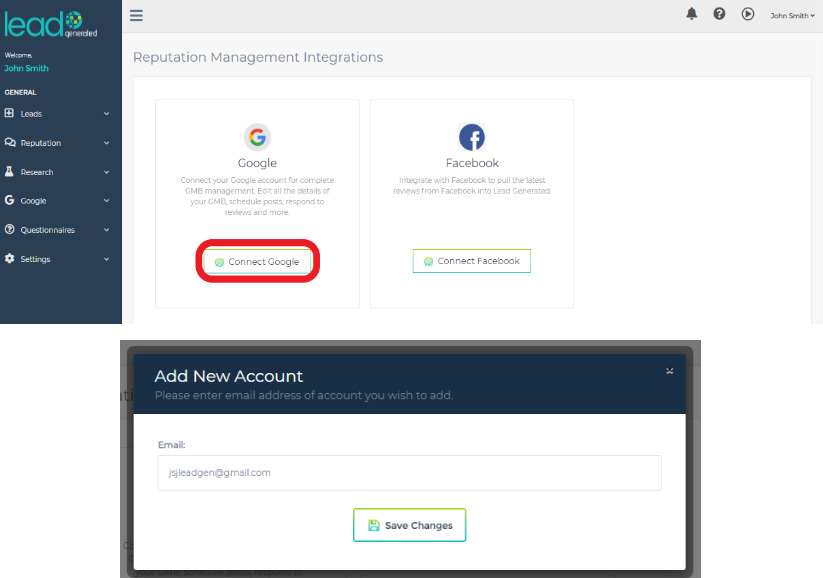
You can connect a new Google Account by clicking on the "Connect Company" button at the top right hand of the screen. This will take you to the "Reputation Management Integrations" screen. Here you will be able to connect via Google or Facebook (Facebook is currently in development). You can then connect your Google account by following the Connect Google Account support guide.
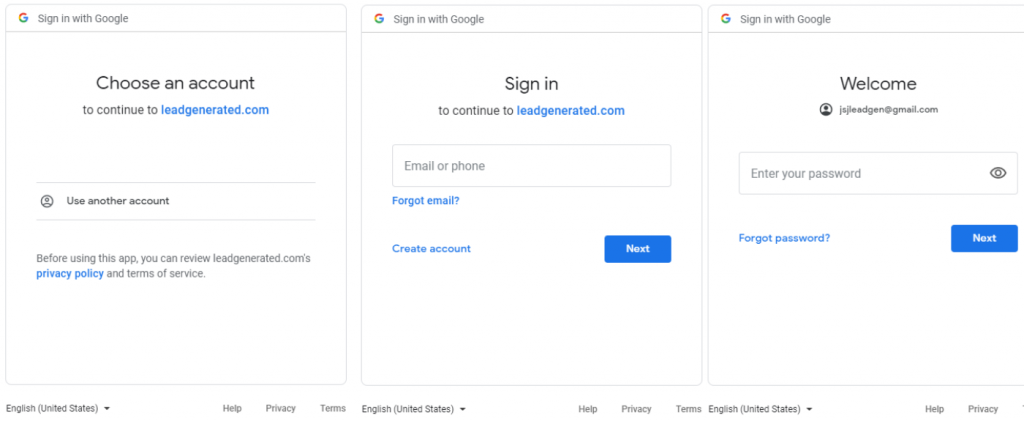
When you click on "Save Changes" you may get directed to a "Sign in with Google" screen like the one below. Simply choose the Gmail account you want to connect to. If it is not listed then choose "Use another account" option and you will be presented with the familiar Google sign in screens.
You will then be redirected back to the LeadGenerated console and your new Google Account will be listed in the Google - Google Accounts section of the navigational menu.
Returning to the "All Companies" screen, you will see that it gives you an overview of the current status of your company and it's reputation, if it has been activated or not, the number of connected review sites, the review sites that are connected (e.g. Google), the average rating, the number of reviews, the date of the last review and a column of actions. All the fields are non-editable, as most of them are simply displaying information from other sections, except the "Actions" column which will have either an "Activate" or "View" button shown.
Activating Company
Before you can use any of the other sections, you must Activate your company's Reputation Management access via this section. This will require the use of 1 Reputation Credit. To activate your company for use in the Reputation module, go to the far right hand column labelled "Actions". In the row for the company you wish to activate, you will see a red button titled "Activate" with a down arrow on the left hand side of it.
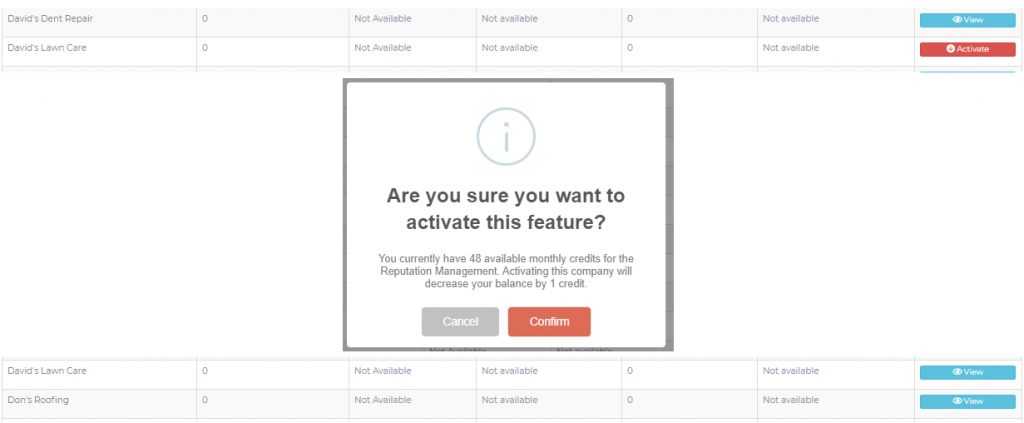
When you click the Activate button, you will be presented with an information box asking "Are you sure you want to activate this feature?" along with a message telling you how many monthly credits you have left for the module and that activating this company will decrease your balance by one. You are then offered the chance to "Cancel" this if you change your mind or "Confirm" if you decide to go ahead with it. If you choose "Cancel" then you will simply be returned to the All Companies list without any changes being made.
When you select "Confirm", the system will then activate your company and tells you it has been successful in another pop-up information box with a circle ticked. The screen will then automatically refresh and you will notice the red "Activate" button in the far right hand column has now been replaced with a light blue "View" button with an eye icon to the left of it.
You have now successfully activated your company for use with the Reputation Management module of Lead Generated system. If you now click on the "View" button in the "Actions" column you will be taken to the Reputation Dashboard.

