Qualified Call Filters

The default behavior for phone calls arriving in Lead Generated is to hold them in the all calls area and not add them as leads. This allows you to preserve an accurate lead count within the leads section of Lead Generated and not have your leads be watered down by telemarketers. In a sense, your calls are held in a quarantine area until they are moved to the leads area. This process can be done manually or automated.

Manually Add Call

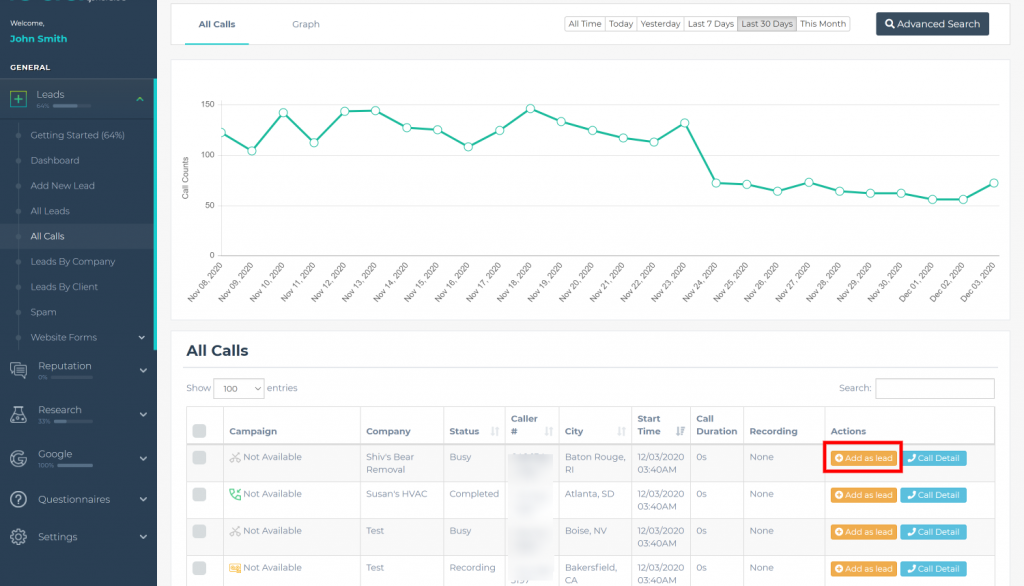
Click “add as lead” from the calls page. This converts the call to a lead and moves it to the various lead pages throughout the application.

  1. Expand Leads from the left navigation.
  2. Select “All Calls”.
  3. Click the “Add as Lead” button.

Qualified Call Filters

The qualified call filters automate the process of moving calls to leads based on the rules that you set. This is done on a company level from the edit company screen.

  1. Expand settings from the left navigation.
  2. From within the settings menu expand companies and then select all companies.
  3. Click edit next to the company for which you would like to adjust the qualified call filters.
  4. Navigate to the Qualified Call Filters area.
  5. Select and adjust your filters.
  6. Click update to save your updated call filters.

For calls to be added as a lead they must meet all the selected qualified call filters. To add all calls as leads enable the call filters without any of the call filter selections.

  • Qualified Call Filters Enable – This enables or disables the qualified call filters.
  • First Time Callers – When this is enabled calls from first-time callers only will be added as a lead.
  • Call Duration – Only calls with a duration greater than the specified time will be added as leads.
  • Answer Status – Only calls that have a status matching the selected calls will be added.
  • Phone Number Area Code – Only calls that match one of the selected phone number area codes will be added as leads.

Remove CallSling Integration

Note! Before Removing CallSling Integration

Removing the integration to CallSling is and simple process. Removing the CallSling integration will remove any call data from your account. If you add the integration back into Lead Generated it will only pull in the 200 most recent calls from your account.

Before removing the integration be sure to check if the problem can be fixed by enabling or editing the mapping of your CallSling account. For more information on this process please read this guide: Edit CallSling Mapping

Reasons to Remove CallSling

There are two primary reasons you may want to remove this integration.

  1. First, the obvious one, you are no longer using CallSling.
  2. Another scenario to remove this CallSling integration is if you are experiencing syncing issues with your account. You can remove the connection and then re-add the account. It should not be necessary to remove the integration every time you add a new company to your CallSling account as Lead Generated should automatically pick up the new company.


Steps To Remove CallSling Integration

  1. Expand Settings from the left side navigation.
  2. Select integrations.
  3. Select “Integration Details” from within the CallSling box on the Integrations page.
  4. In the top right corner select the remove integration button and click confirm.

Edit CallSling Mapping

What is CallSling Mapping?

CallSling Mapping is the process of associating the companies within your CallSling account with a company within your Lead Generated account.

When do I need to do this?

Depending on how you created your company within Lead Generated you may not have ever need to do this step. If you skipped the company creation wizard that walks you through the various connections you will need to create the association between CallSling and your Lead Generated company manually.

Steps: Edit CallSling Mapping

  1. Click Settings on the left navigation to expand the menu.
  2. Select Integrations.
  3. Select integration details from the CallSling box on the integrations page.
  4.  In the top right corner select the “Edit Companies Mapping” button.
  5. Use the select box from the right to choose your company within Lead Generated that lines up with the company listed on the left side from your CallSling Account.
  6. Select the “Enabled” checkbox next to the company to enable bringing the calls from your CallSling account.
  7. Click Submit to update the mapping of the companies.


Understanding the Edit Mapping Screen

The list of companies on the left side is the companies that our system has found from your CallSling account.

New CallSling Company

Your company should automatically be listed within your Lead Generated account as our system syncs with CallSling. So as you create new CallSling companies they are added to the list of companies on the left side. For each new company you create within CallSling  you will need to let our system know which Lead Generated company it is associated with.

  1. Find your new company on the list of CallSling companies
  2. On the left side and select the associated company in the select box from the right side.
  3. Check the checkbox next to the company to enable bringing in the calls.
  4. Click the button in the bottom right corner to finalize the connection.

My CallSling Company Is Not Here

If you have created a new company in your CallSling account that is not showing within Lead Generated please contact our support through our ticketing system here: Submit ticket. Alternatively, you may try removing your CallSling integration. Please read this guide before attempting to remove the integration.

Connect CallSling

Callsling Integration enables you to manage all your leads, calls and form submissions, via Lead Generated and avoids having to keep switching between the two applications.

Once you have CallSling integrated, the companies you have set up with the phone tracking system will bring their associated leads into Lead Generated automatically.

You can then manage the leads by adding them, forwarding or deleting them as required.

How To Video

Step by Step Guide

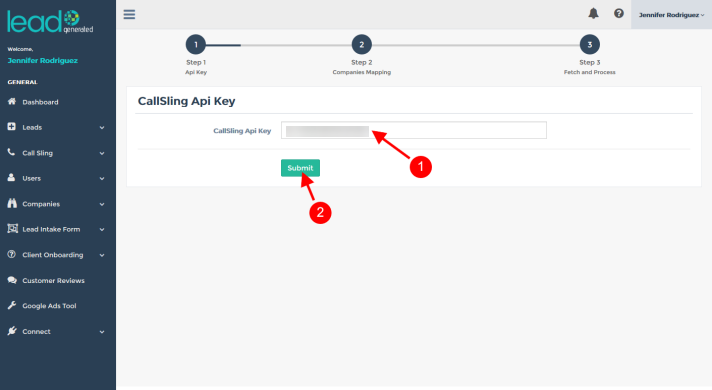
CallSling API Key

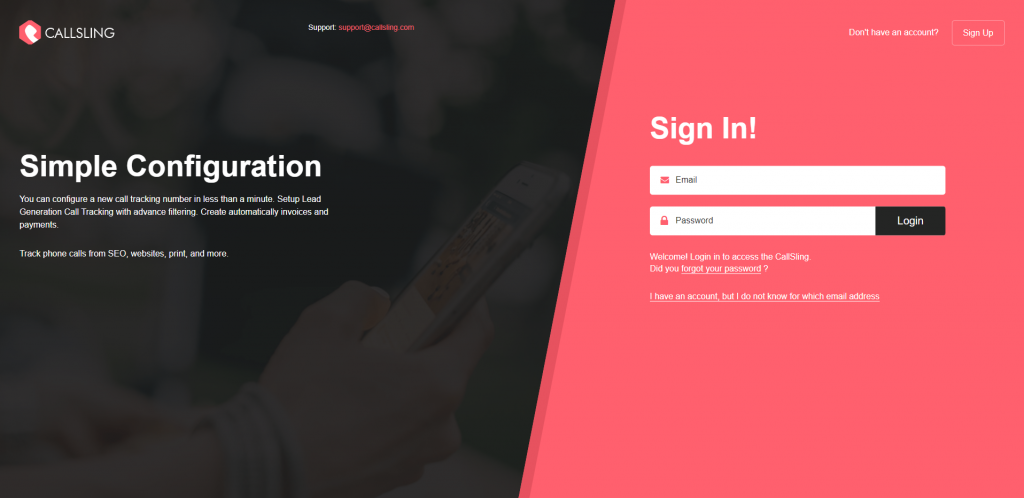
1. Login to CallSling.

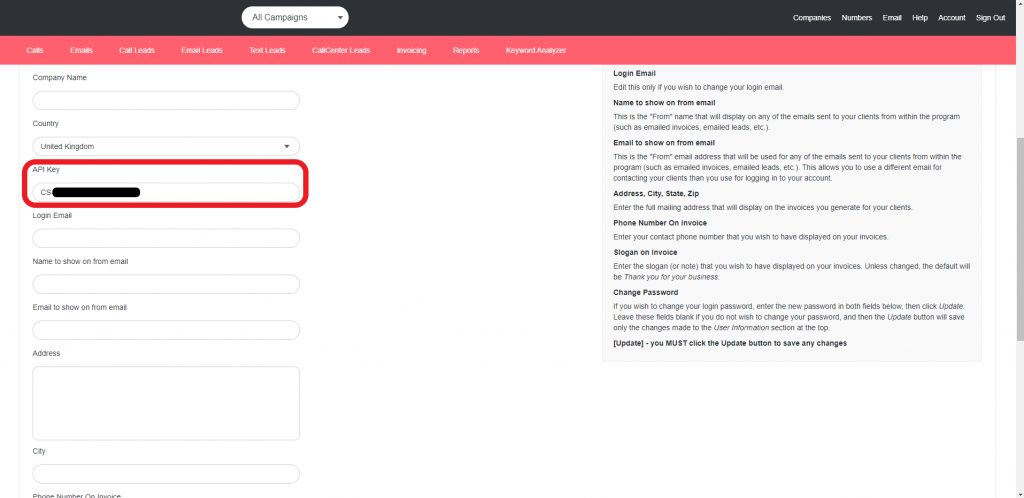
2. On the top right menu, click on “Account” or “My Account”.

3. Scroll down the page and locate the API key field in your account page, then select the API key and right click to copy it.

Lead Generated Integration

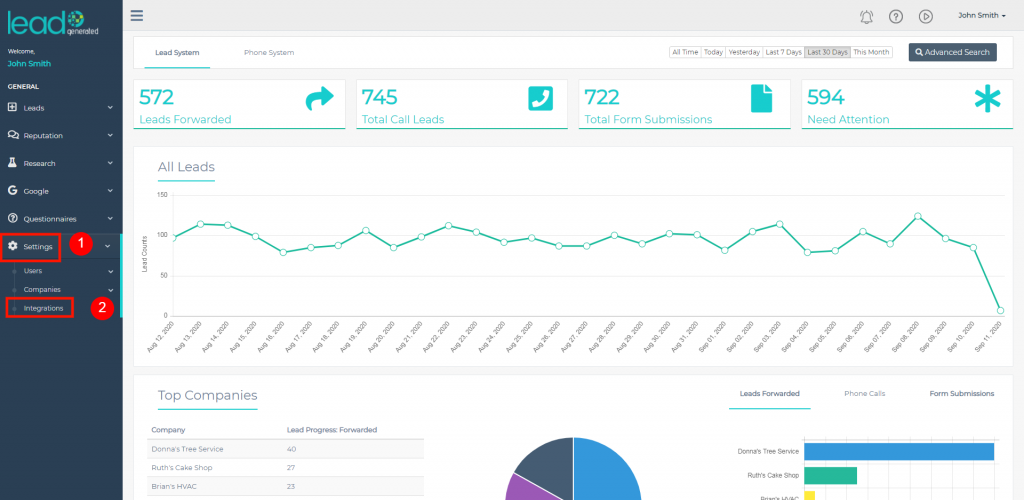
4. Login to Lead Generated. Click on “Settings”, then “Integrations”.

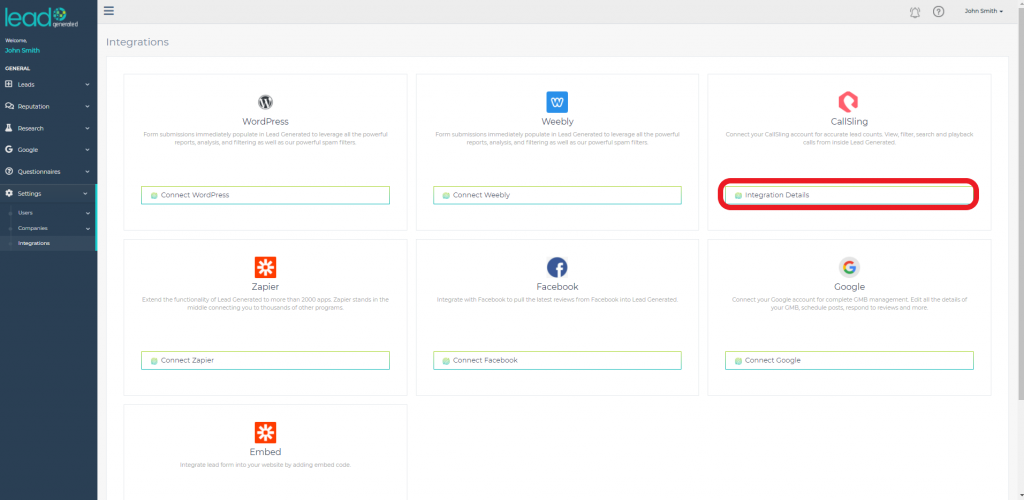
5. On the CallSling option, Click on the “Integration Details” button.

6. Paste the API key you copied from your CallSling account in the CallSling API Key field, then click on the “Submit” button.

Activating CallSling Synchronisation

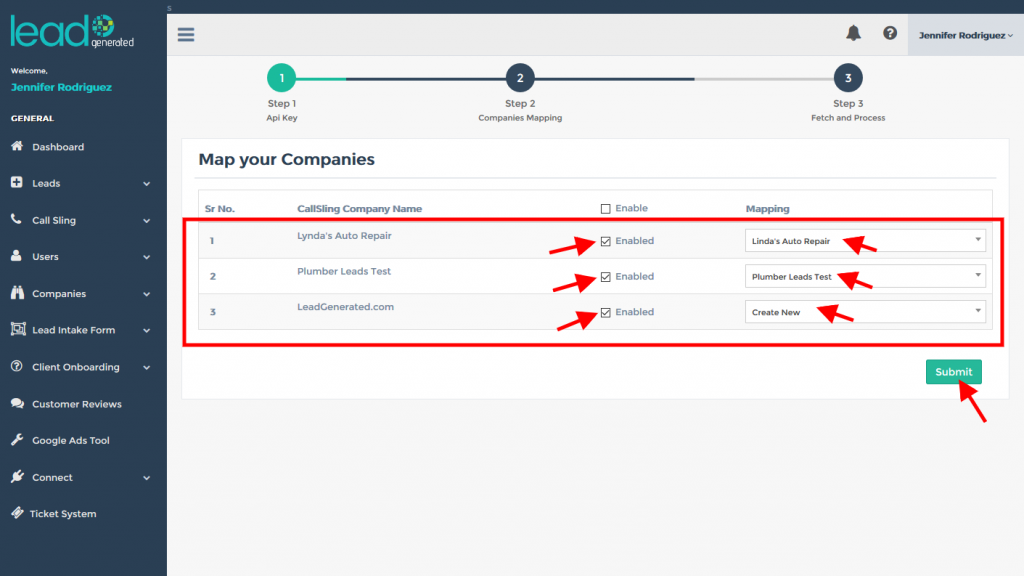
7. Click on the “Enable” box for each company you’d like to import the last 30 days of call history. Then map each company you wish to import to either an existing company in your Lead Generated account or select the “Create New” option. Then click on the “Submit” button.

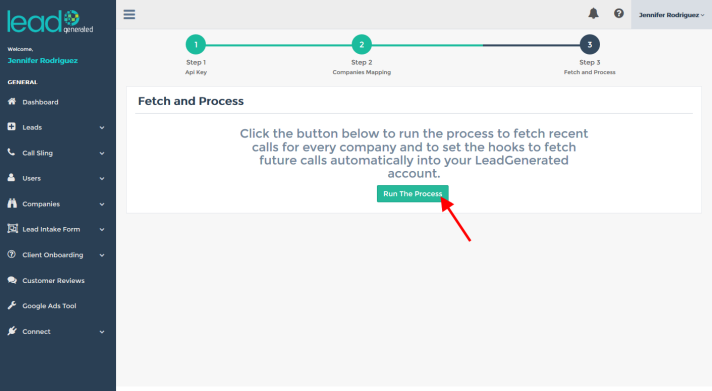
8. Click on the button on the Fetch and Process screen to connect and retrieve your account information.

9. Congratulations! Your account has been successfully linked to CallSling and you can now view calls by clicking the button on this screen. Alternatively, you can also view calls by selecting “CallSling”, then “All Calls” or “All Companies” on the left menu.