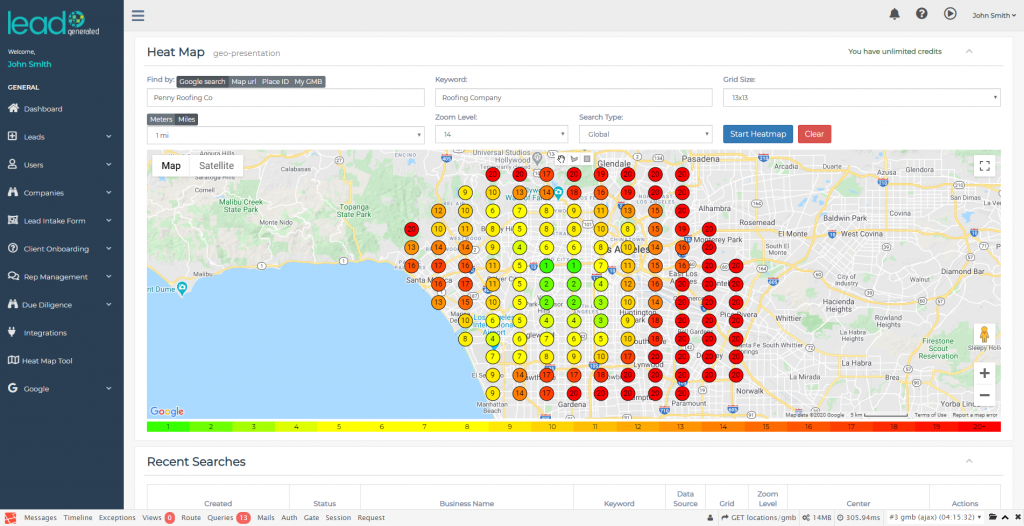
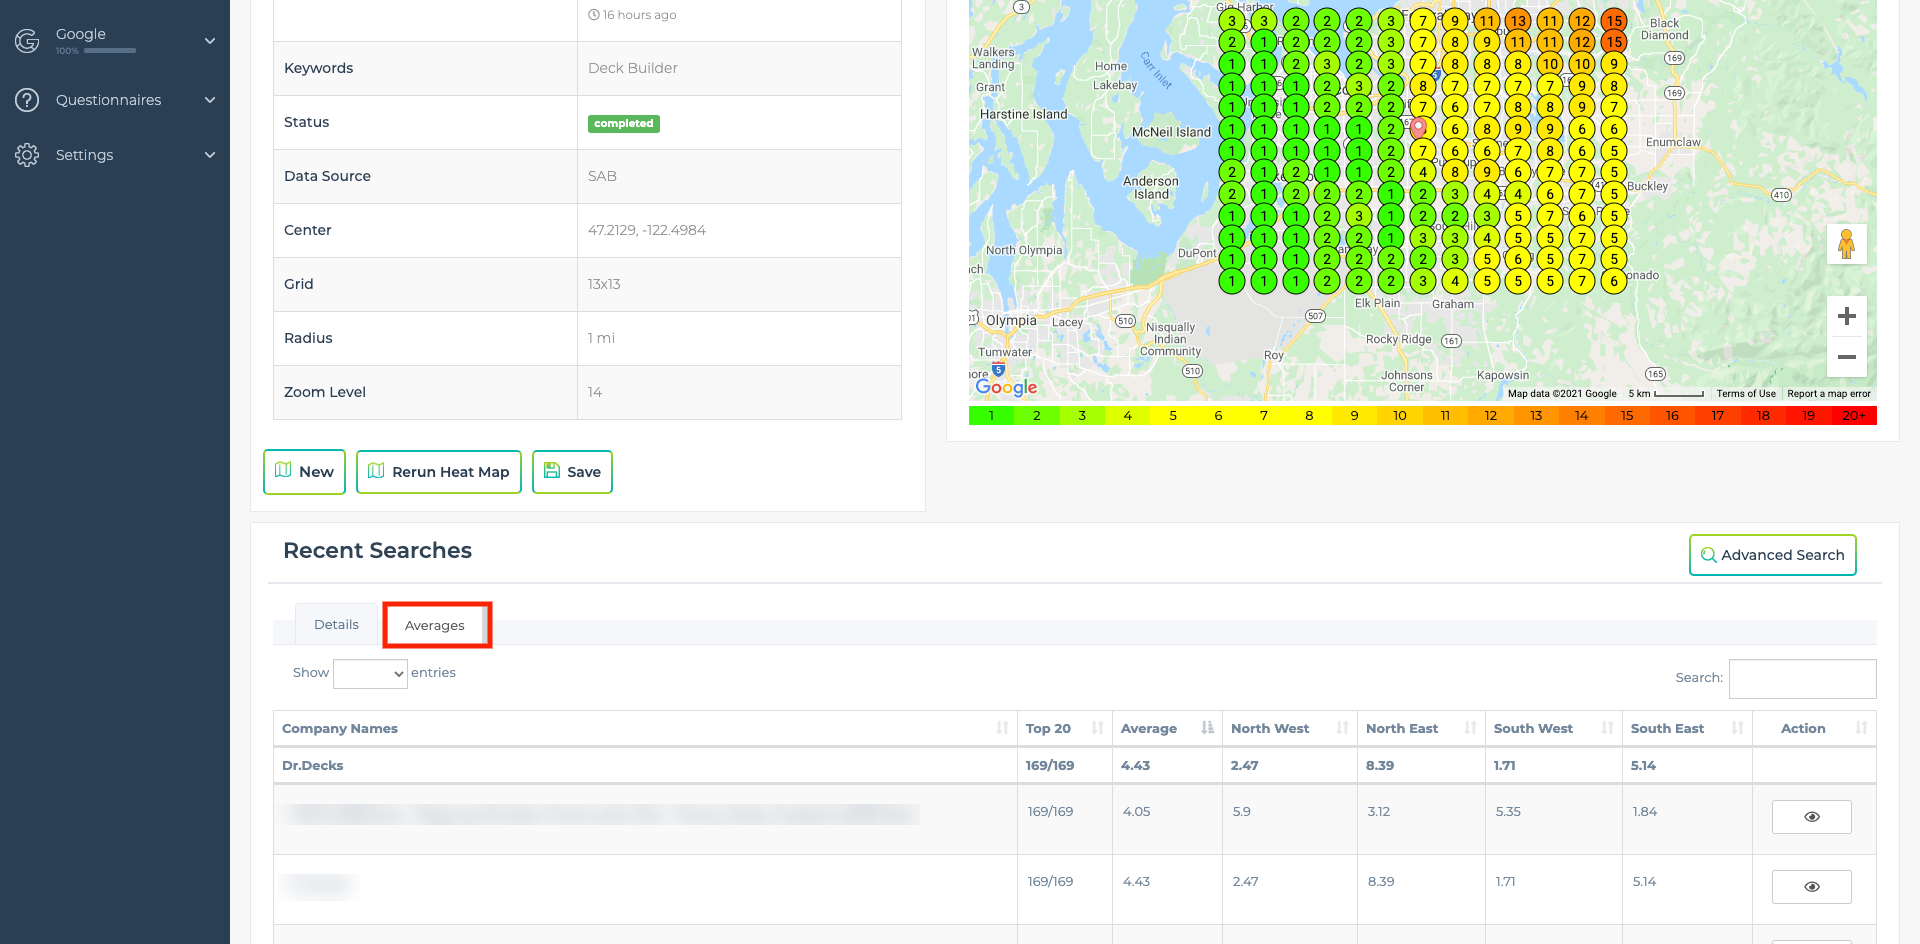
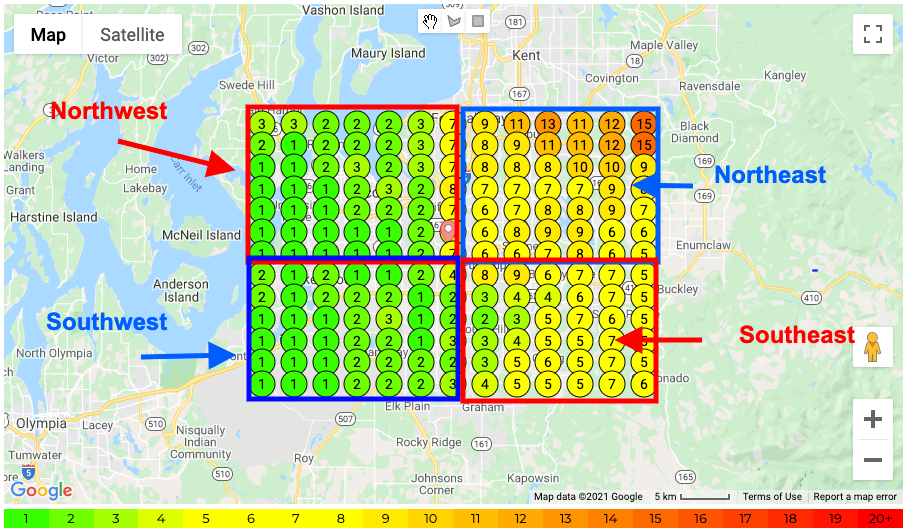
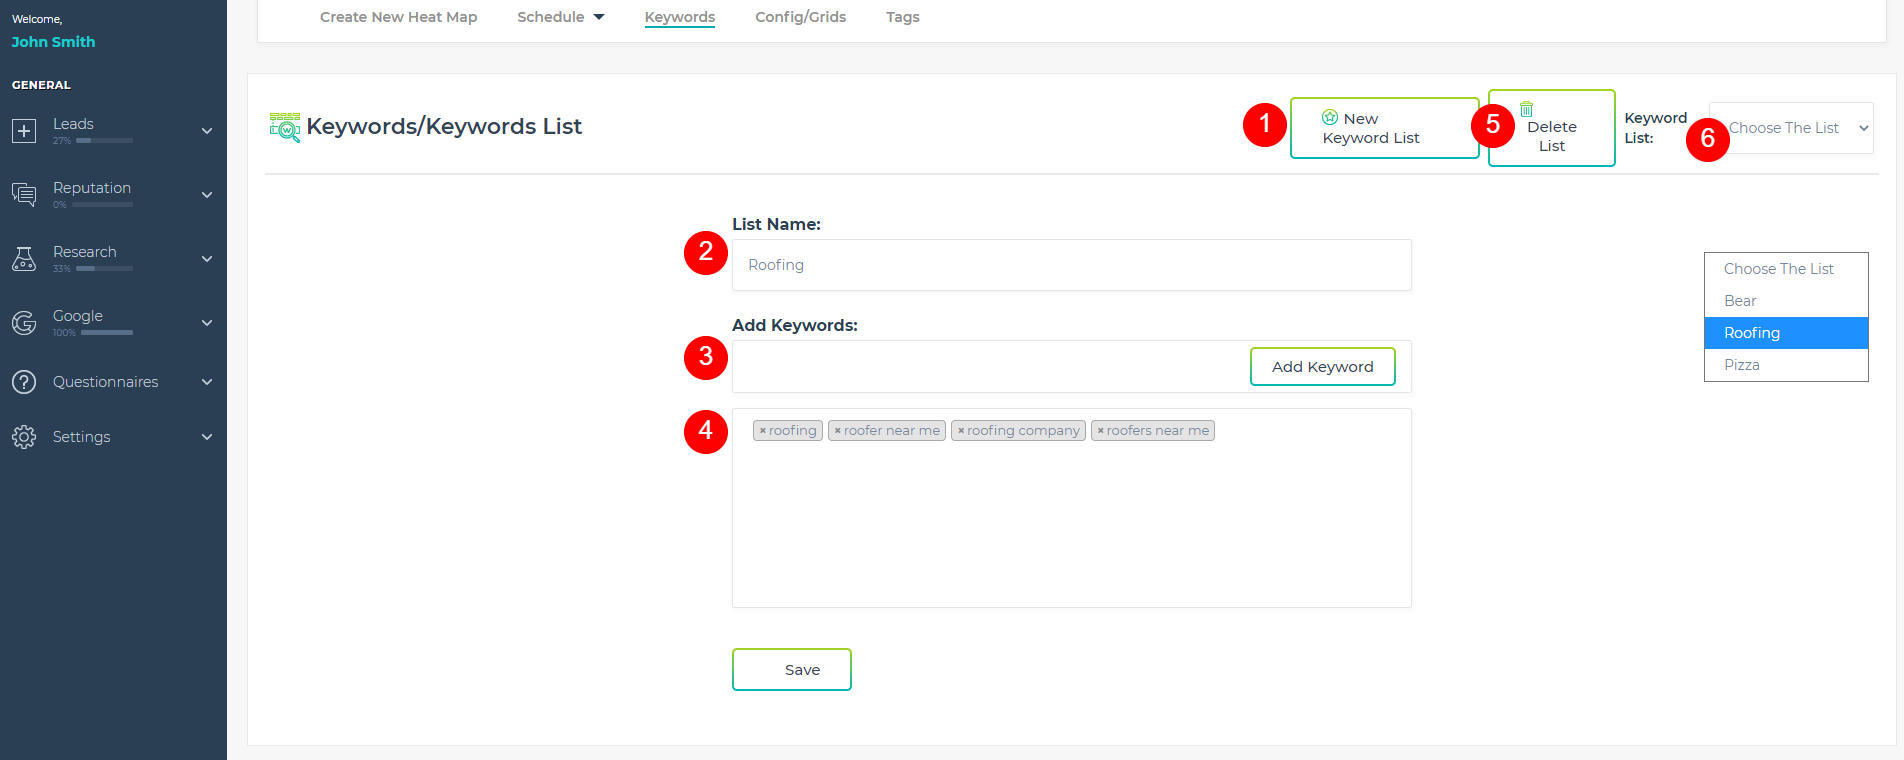
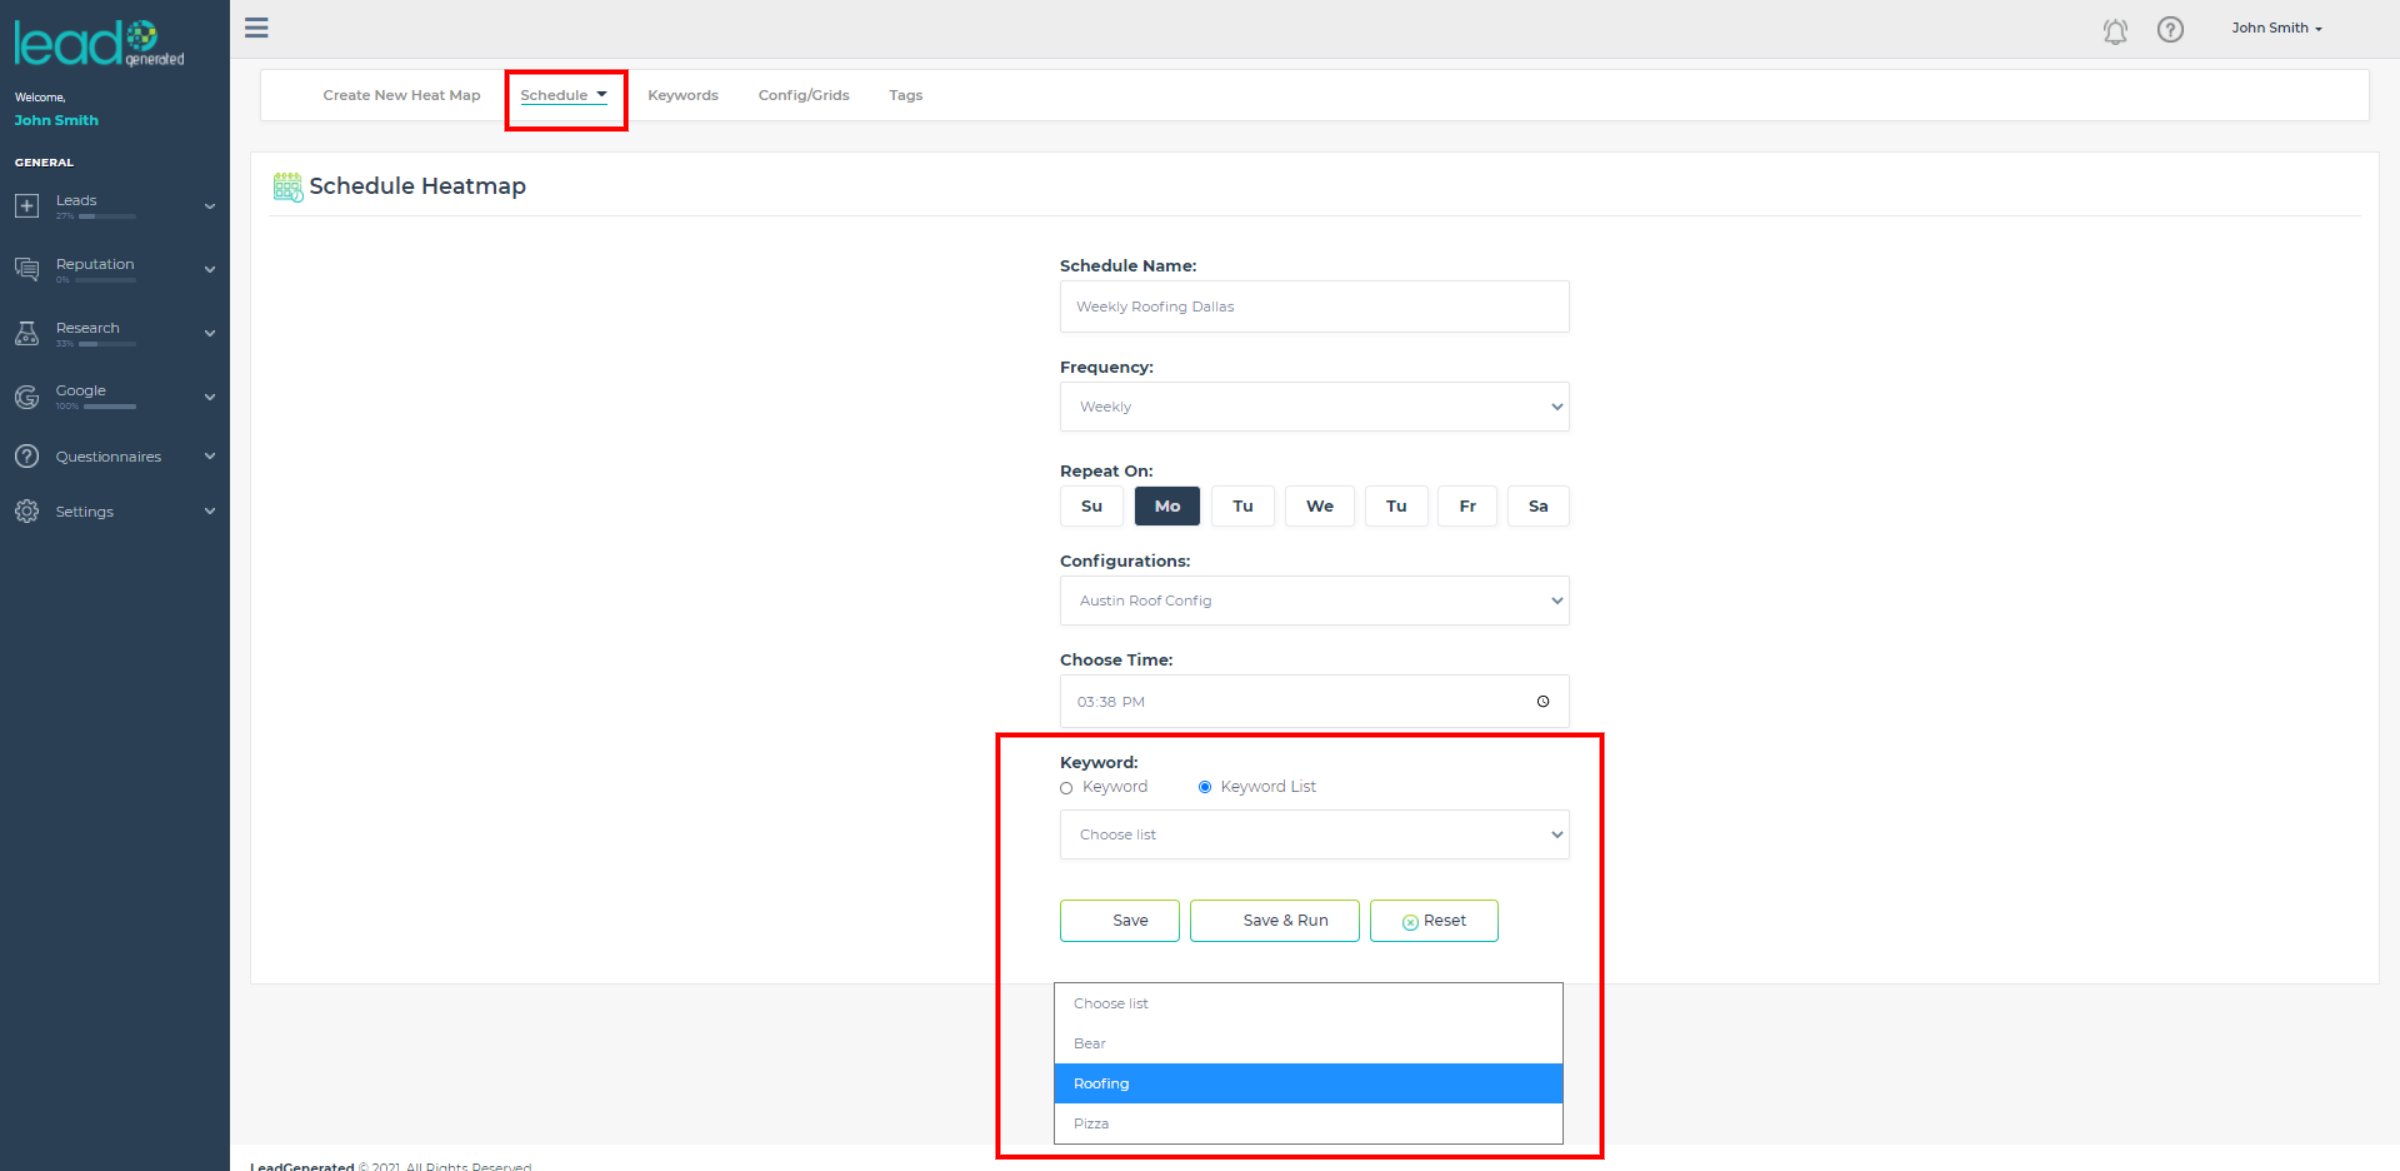
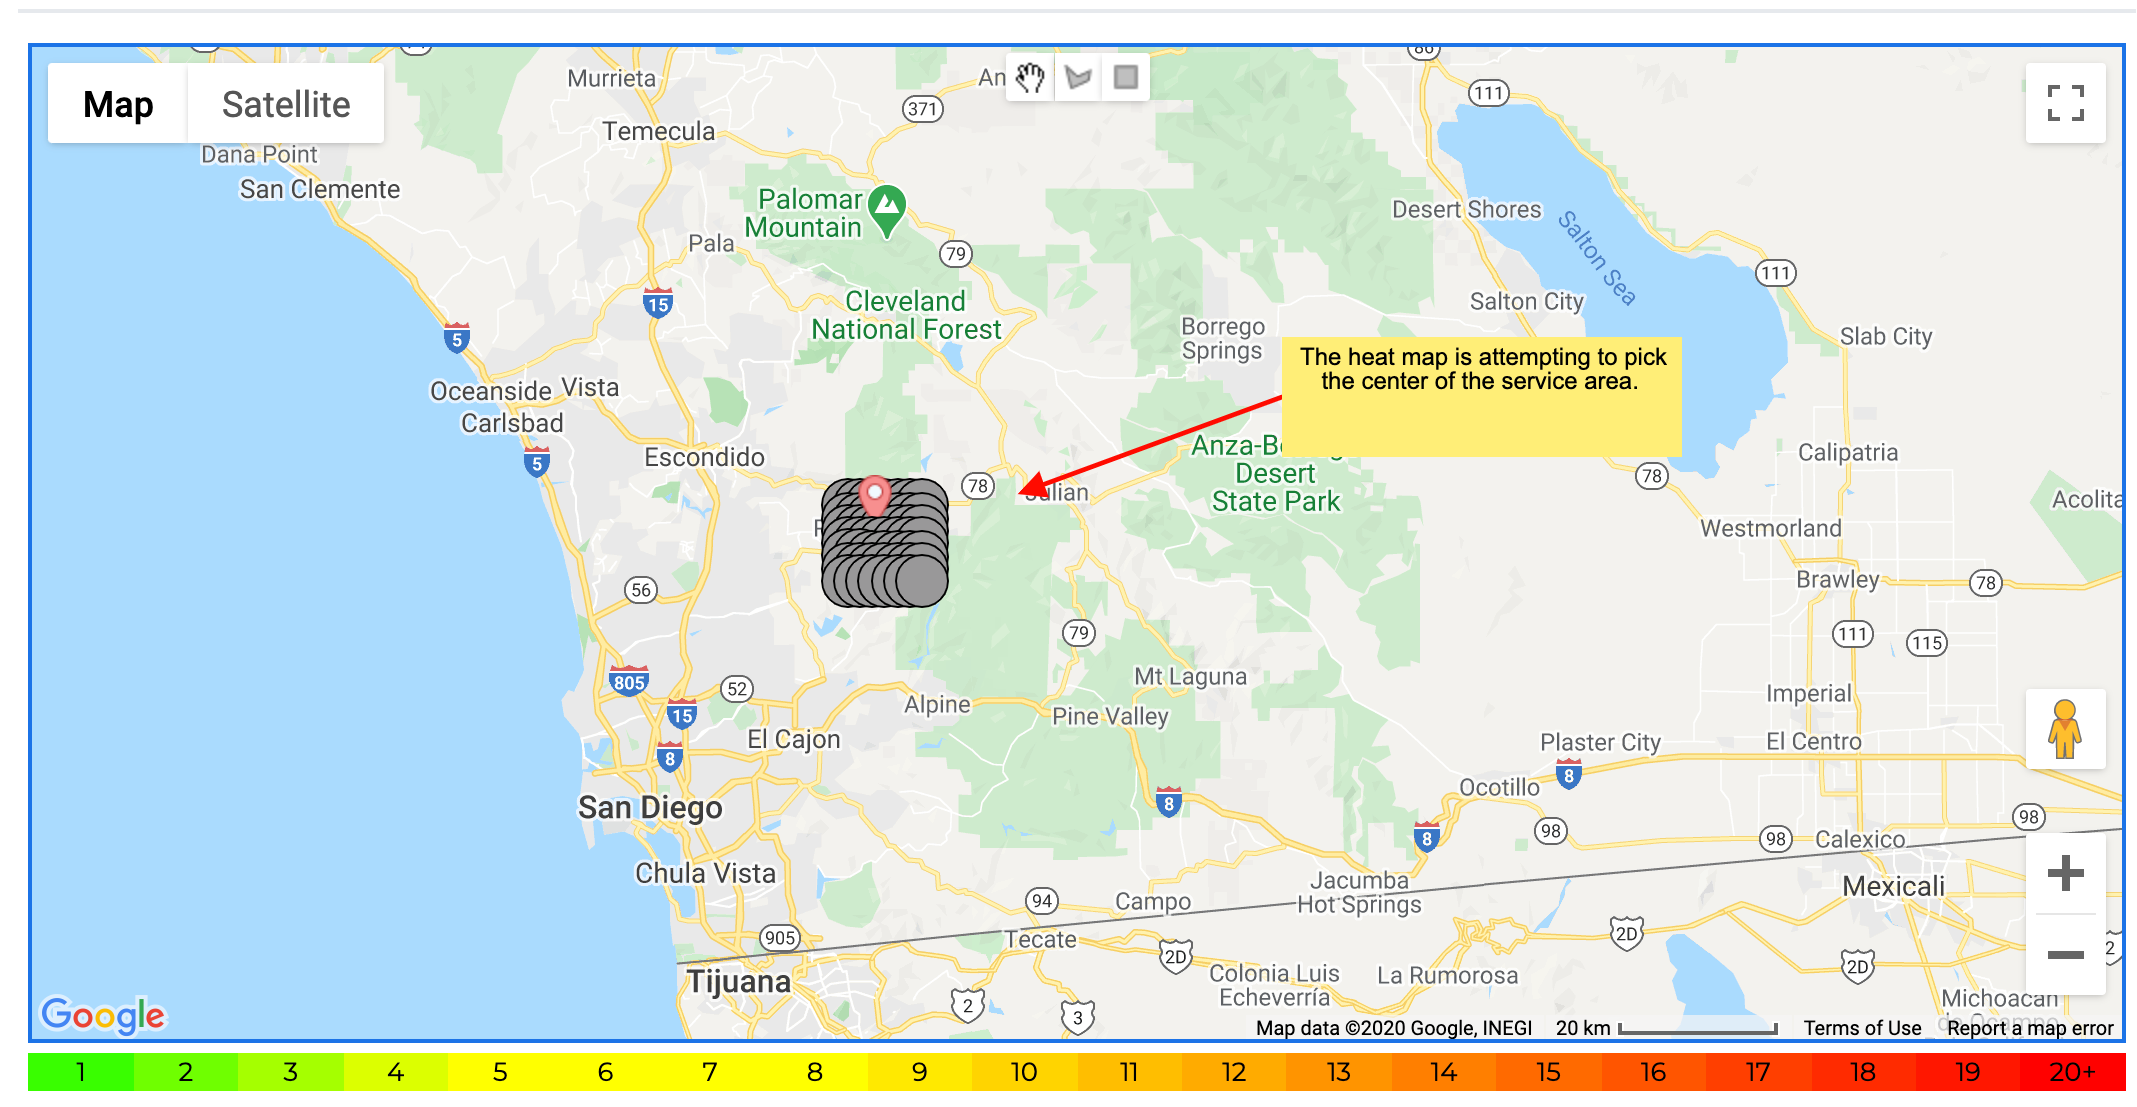
The heat map tool provides a color-coded grid with numbered rankings for your Google My Business across a local geographical area. You will notice in the heat map example below the rankings range from 1 (bright green) to 20 (dark red). The circles that have 1 signify that if the Google search was performed in this location for this keyword the associated Google My Business (GMB) would have the highest ranking spot within the maps section of the search result.
Heat Map Example Results
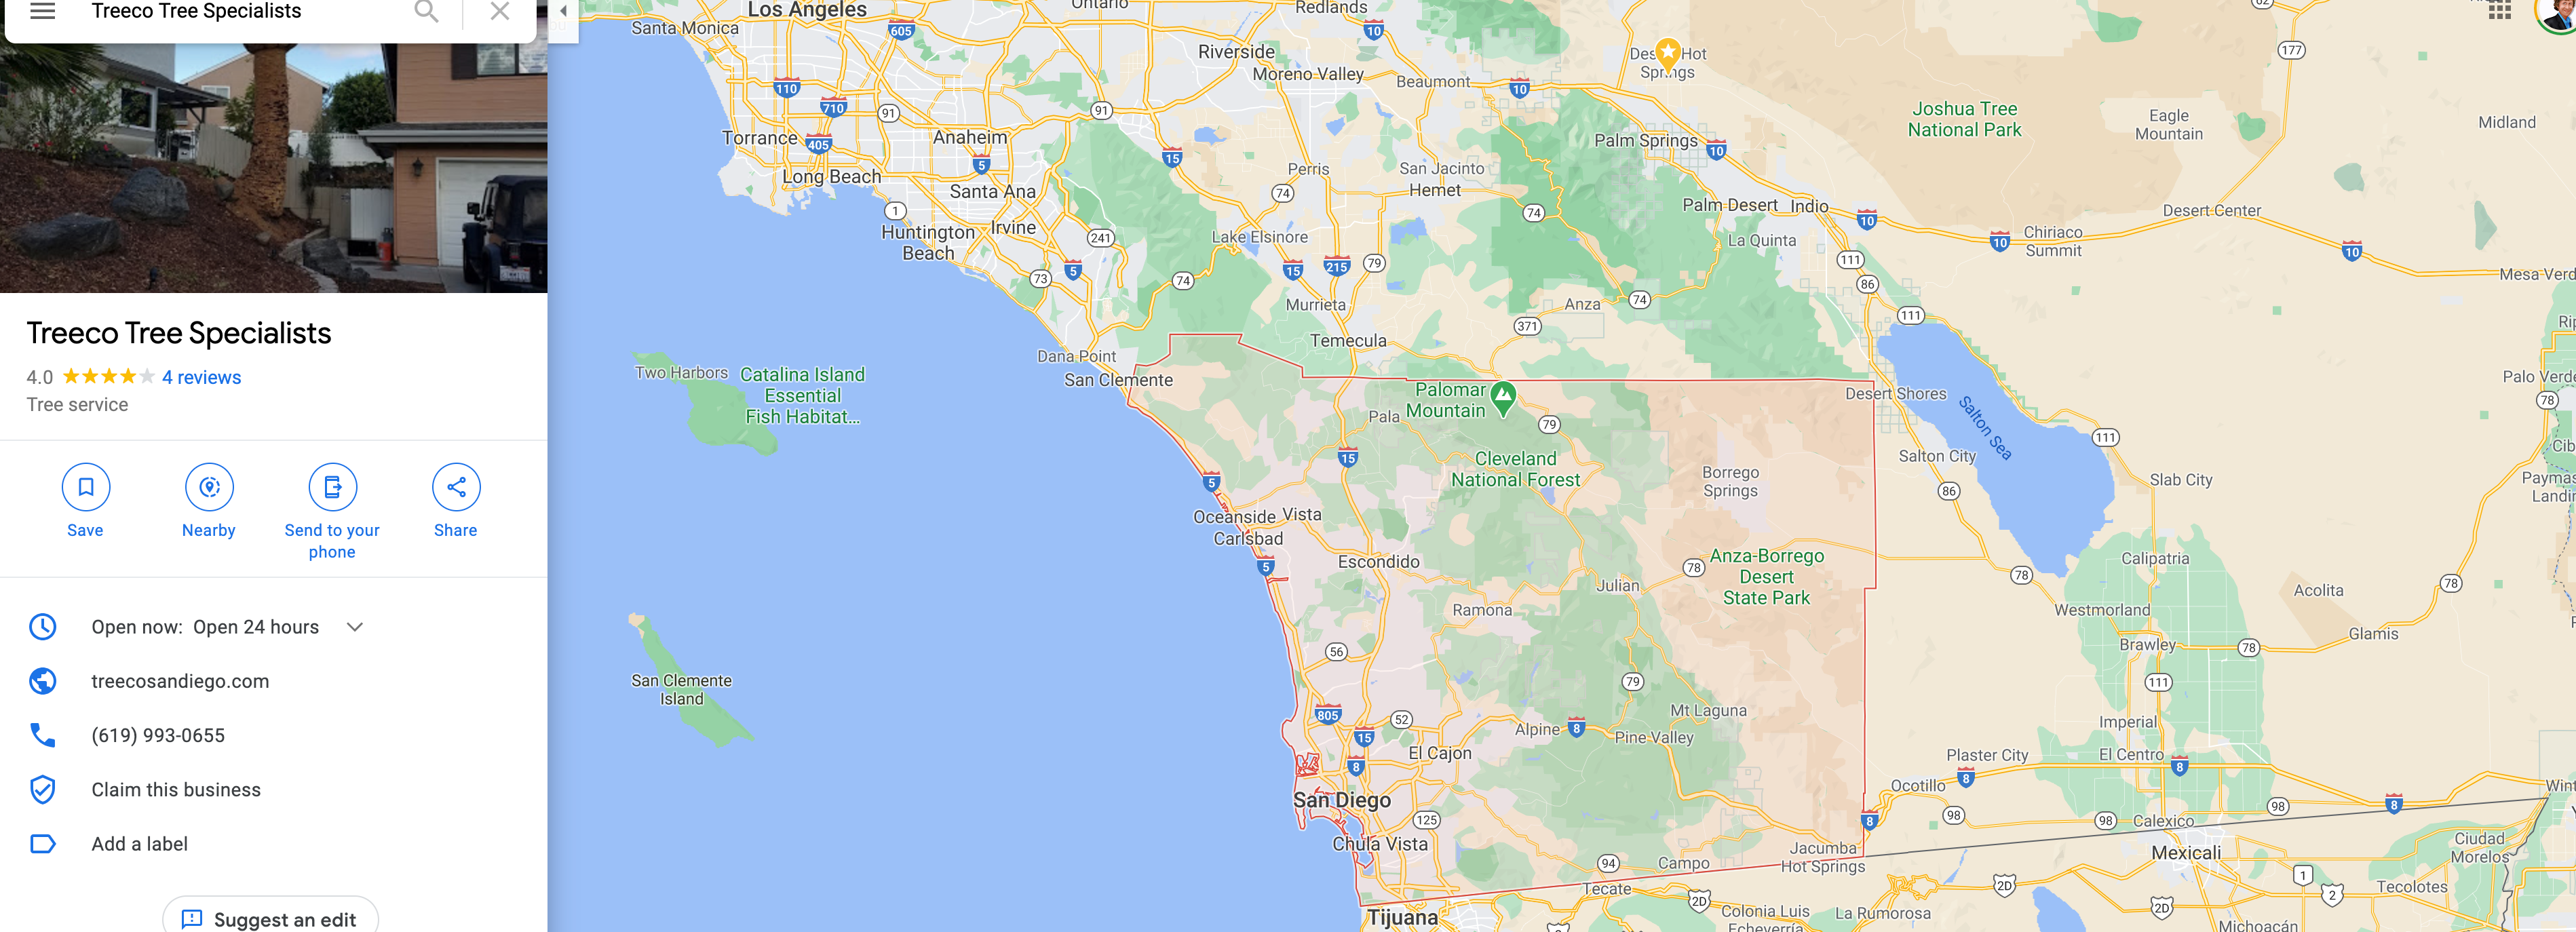
GMB Map Area
Before we continue to explain the fine details and customizations that apply to the heat map tool let’s make sure we are all on the same page.
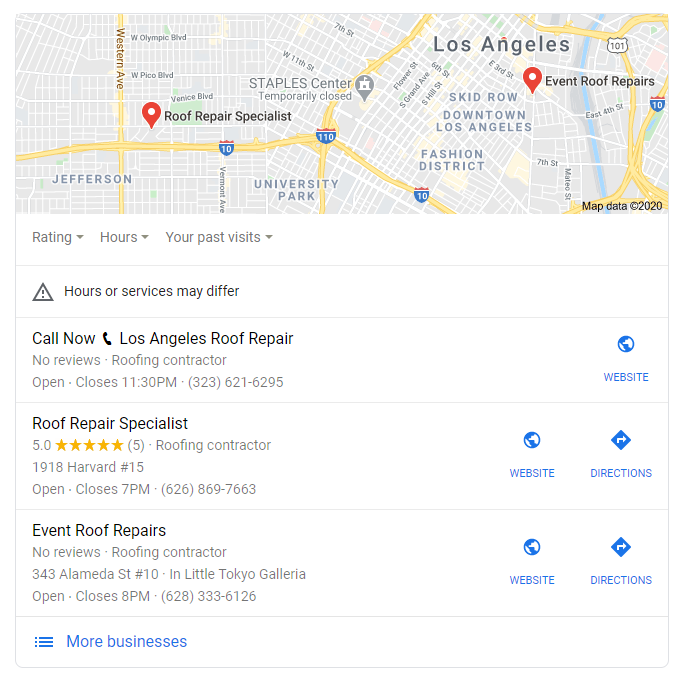
There are several areas in any given Google search result and those areas change depending on several factors. If Google is able to determine that there is local search intent, such as “Plumber Near Me” then they will show the maps or Google My Business area of the search results. You will see what this map area looks like in the picture below.
For local search, the GMB area holds the highest value with different studies showing 50-70% of the total clicks on a search result happening in this area alone.
Proximity is a major factor in your ranking within the GMB area of the search result. Google is more likely to show searchers who are closer to the address where the GMB was originally verified. This makes sense though right? If you were looking for a local restaurant you would probably be more interested in the places that are near you then ones that across town.
This means if you do a search from one spot for a local term and then you go a few miles down the road you might get very different search results.
There are many things that will influence your ranking within the coveted GMB area. The heat map tool provides an abundance of valuable information about local rankings. From checking your current results to researching the competition and doing niche research this tool can provide critical information for any local business.
Map Area Example
How does it work?
First, you define the Google My Business that you would like to evaluate. There are several ways to do this and we will cover more of these in a little bit.
Next, you choose a keyword that you would like to analyze for the chosen GMB you provided in the first step.
From here there are many different ways to define the area you would like to perform your search. You may want to search the entire Chicago area or maybe just a small suburb. We have built our tool in a way where you can define the exact area and dimensions of your search.
The zoom level corresponds with Google’s zoom level in its search results. This is an advanced topic that we will cover in more detail later. Luckily we have an auto-selection which is in many times the best choice unless you are an advanced user.
The Heat Map Search Fields
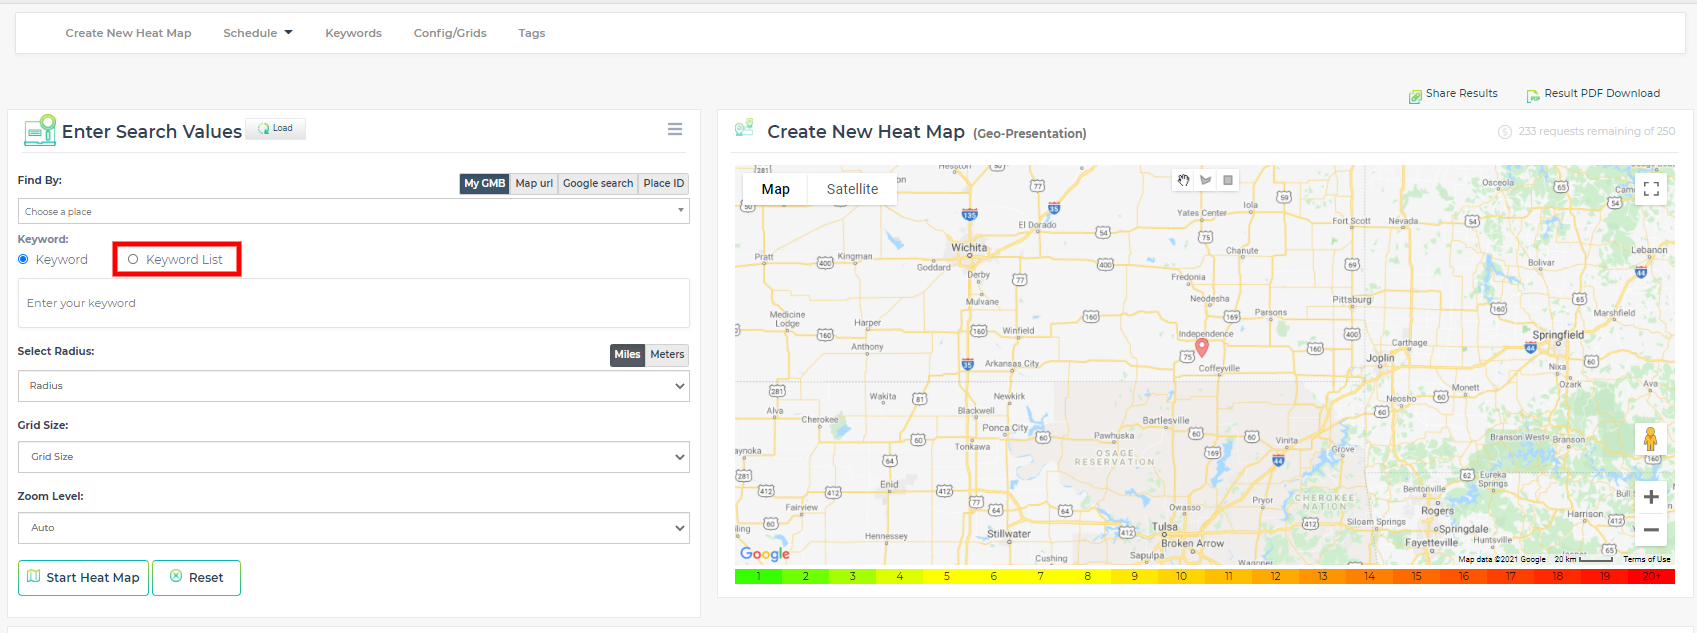
To run a heat map search first you are going to need to fill out the little form so the heat map knows how to perform the search.
Heat Map Input Fields
The search results are performed on a specific Google My Bussines (GMB). The “find by” field is where you define the specific GMB you will be evaluating during the search. There are 4 options for choosing this location.
Google Search
The first and easiest one is Google Search. You can simply type in the name of that was used for the Google My Business and select the from the list of matching results. Unfortunately, this will not work for many business types and you may need to resort to one of the other methods to locate the GMB you would like to evaluate.
Map URL
Each Google My Business has a unique map URL that can be used to identify it. There are many ways to find this URL, we will show you one that will always work. You can find the map URL for any business, which is great for researching the competition.
1. Select the Map URL option from the top control.
2. Enter this URL in your browser: https://www.google.com/maps
3. Enter the exact name of the Google My Business you would like to evaluate in the top left corner. As you type in this field Google will search it’s listed of verified businesses. When you see the name of GMB, select it.
There are a few reasons that you may not see your Google My Business show up on the list. If the GMB was only just verified it may not be listed here yet. If your GMB is not verified, has a status of pending, or suspended it will not show on the list. For those situations, you will need to address those issues before you take advantage of this tool.
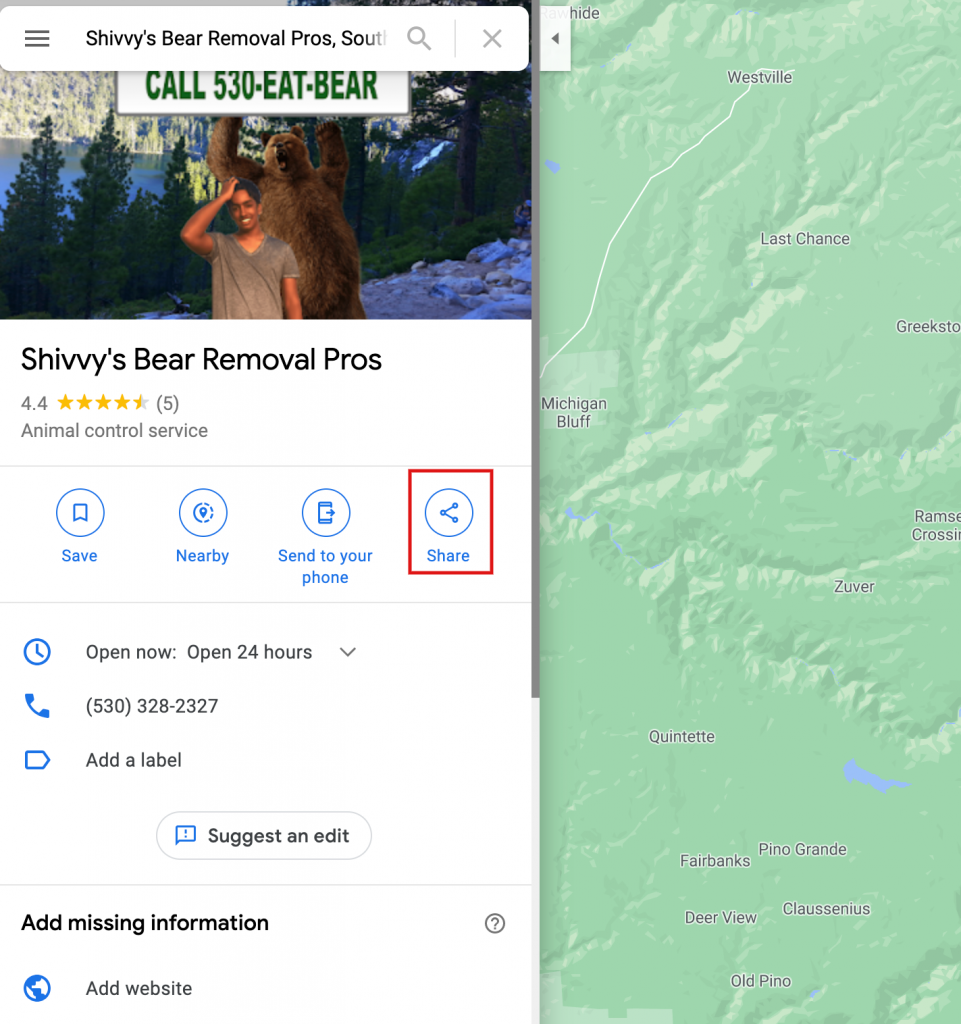
After selecting the company you should be on a screen similar to this one:
4. The next step is to click the share button
5. Click the copy link button from the popup menu
6. Now that you have this link copied you need to post it into the browser address bar and hit the enter button on your keyboard.
After you hit the enter button Google will immediately redirect to another URL. This is an example of the URL after Google Redirects. This is NOT the Map URL
https://www.google.com/maps/place//data=!4m2!3m1!1s0x80998f4d70d041bd:0xac7634c26565b1c3?source=g.page.share
After a few seconds Google will redirect to a different URL. This one is your Map URL. Below is an example of a valid map URL. Notice it does NOT have the word share at the end of it.
https://www.google.com/maps/place/Shivvy’s+Bear+Removal+Pros/@38.8795213,-120.1600487,11z/data=!3m1!4b1!4m5!3m4!1s0x80998f4d70d041bd:0xac7634c26565b1c3!8m2!3d38.879605!4d-120.0199645
7. Copy the Map URL from the address bar of your browser
8. Paste the Map URL into the Find By Field (make sure you have Map URL selected in the top control)
Google Place ID
Each Google My Business has a unique map Google Place ID that can be used to identify it.
- Select the Google Place ID option from the top control.
- Paste in the Google Place ID
My GMB
The My GMB option in the Find By control works with GMB’s that you have added to your Lead Generated account. If your GMB is not showing on the list that it has not been added to your Lead Generated account. To populate this list connect the Google Account that is associated with the GMB.
- Select My GMB from the Find By control.
- Type a few letters of your GMB or select the GMB you would like to perform the heat map search from the list of added GMBs.
- Select the desired GMB
Keyword
The keyword is the actual search team the heat map will analyze. Any slight variation in a search term can yield completely different results. In this box enter the keyword for which you would like to evaluate the rankings. Currently, we have the option to search 1 keyword at a time.
Grid Size
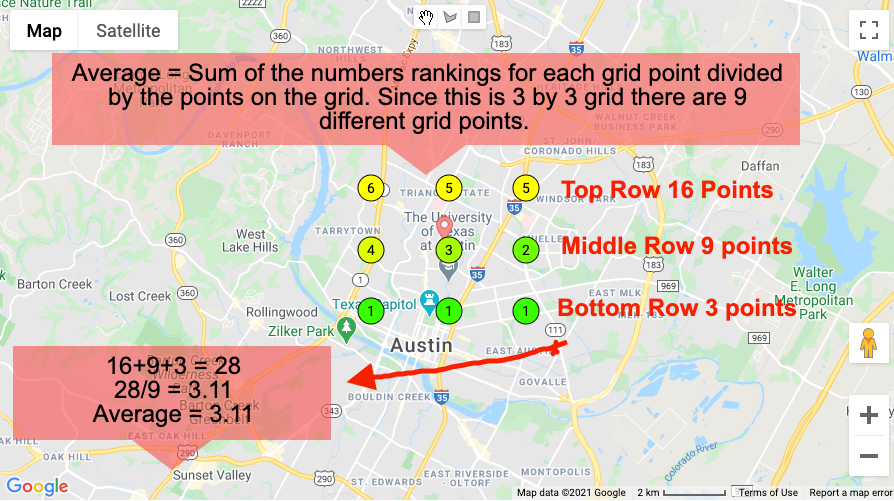
The grid size allows you to determine how many points you would like to check on the map. The number represents how many points go horizontally across the screen and how many go vertically. You see in the selection below we have chosen a 3 by 3 grid.
Miles and Meters
The meters/miles control directly relates to the grid size control. This is the distance between the points on the grid. You have many options for setting the distance. You can use the Metric system or the US Customary Units system of miles. To toggle between the miles or meters click the switch bar at the top. Note you can also set the size of your grid by drawing a square or polygon using the custom grid controls explained in detail later in this article.
This corresponds with the zoom level from Google.
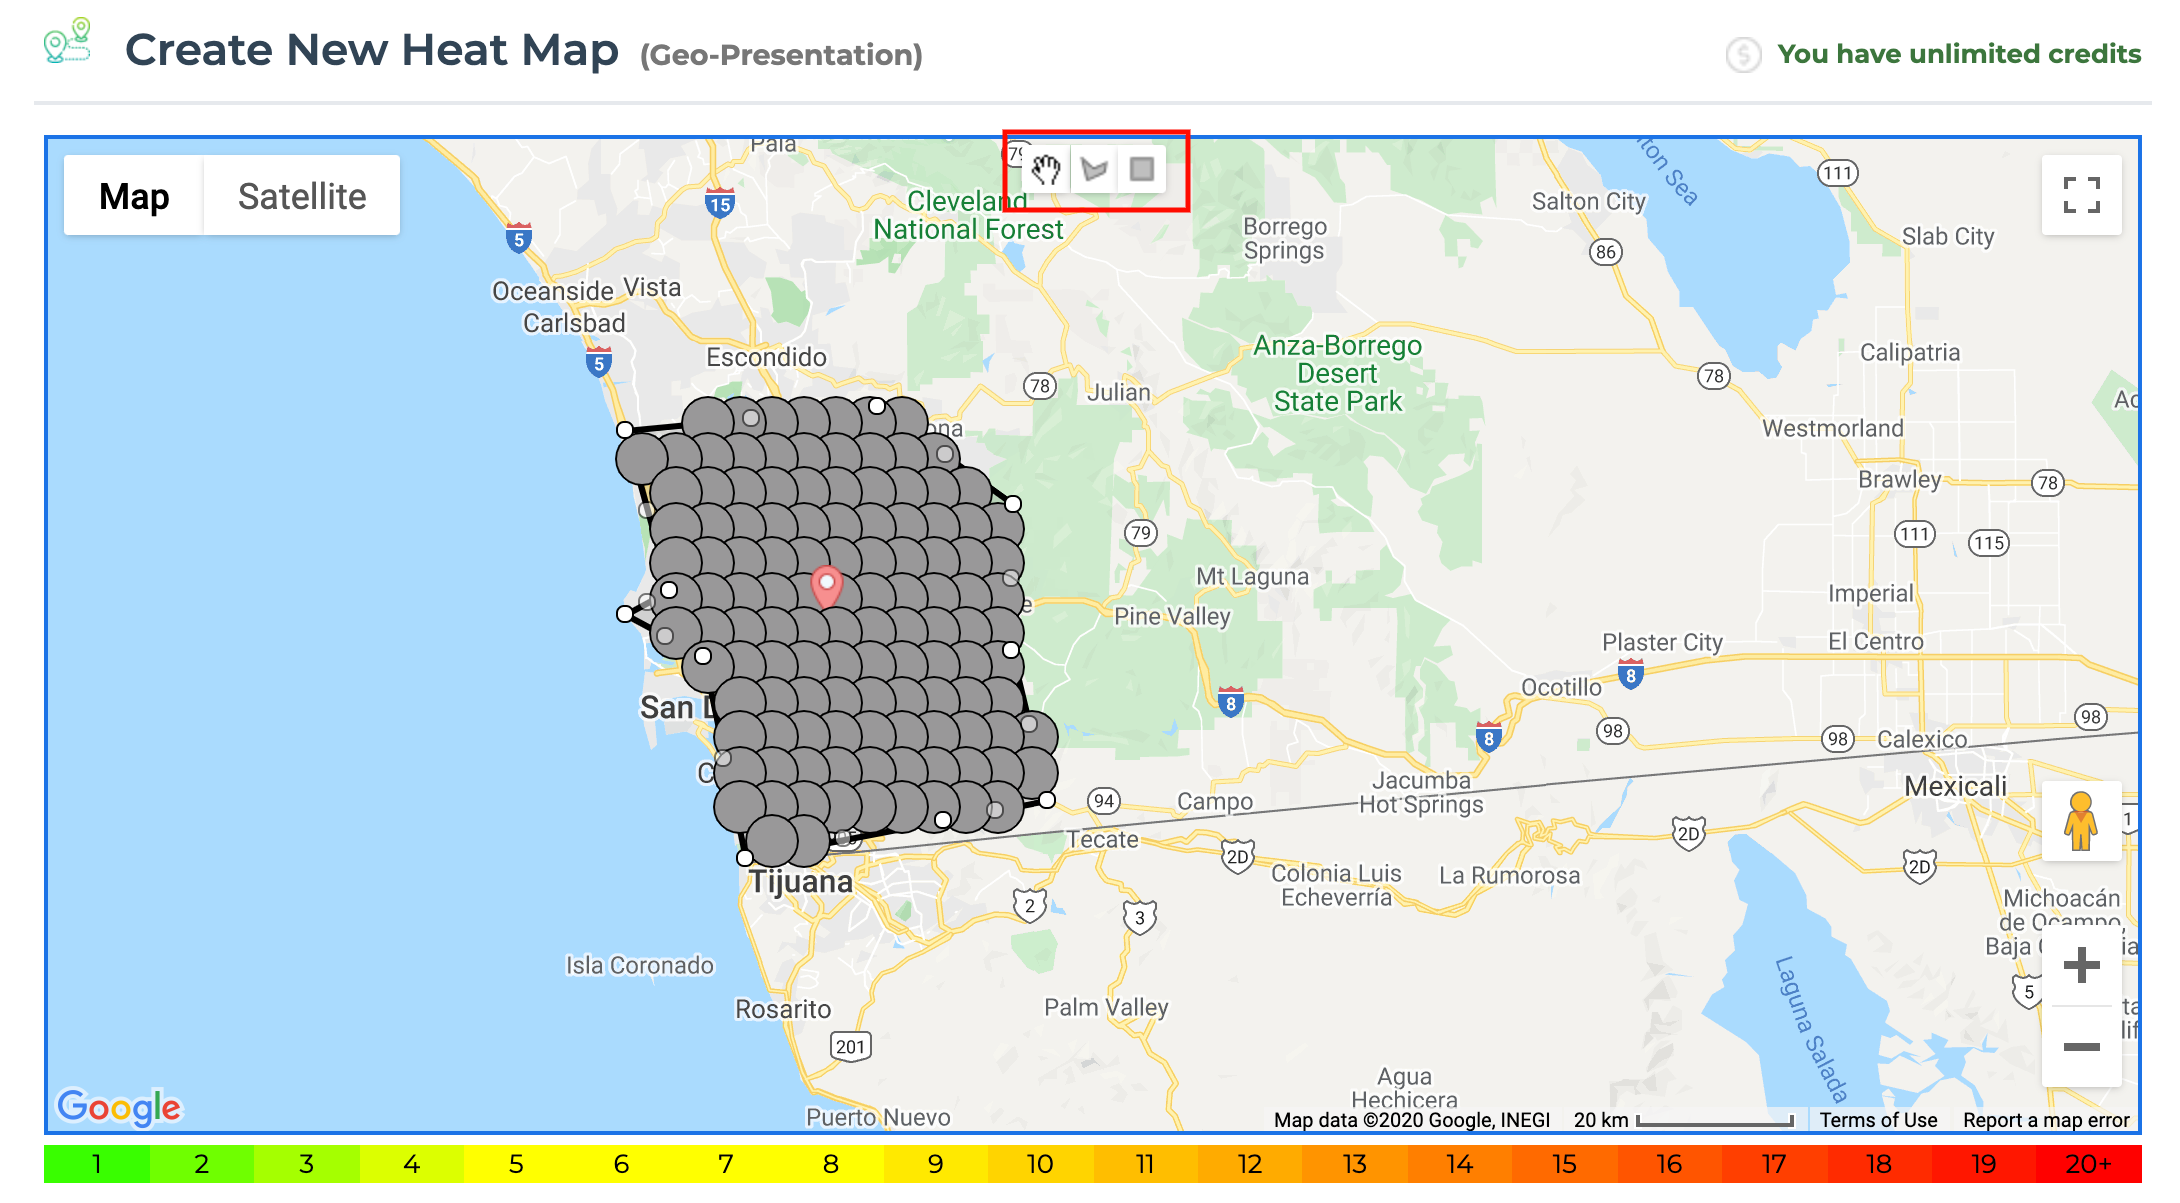
The custom grid controls are three buttons located at the top of the map area that can provide some additional precision when defining the area for a heat map search
These controls are meant to be used after you have already filled out the heat map search settings field above the map. You can use these settings to change the size, shape or positioning of where the heat map search will be performed.
The Hand Grabber Tool
The hand grabber tool allows you to reposition the map by clicking and dragging the map. To use this tool first select the hand icon located at the top of the map. Next, click into the map, keep the mouse button down, and the mouse. You will notice the hand pulls the map as you drag
Draw Shape Tool
The draw a shape tool allows you to create a custom shape and size for the heat map search. The first point you make in the map needs to connect with the last point in the map to close the shape.
- Click the draw a shape tool button within the heat map.
- Click a point on the map with your mouse. For this one, do not hold down the mouse button just click and release.
- Click another point and release the mouse button. Each time you click down it will draw a line from your previous point to your new point.
- Continue creating new points until you have closed the shape by connecting your first point and the last point.
- You can then click the start heat map button to begin your heat map search.
Rectangle Tool
The rectangle tool allows you to draw rectangles for your heat map search.
- To use this tool first select the rectangle tool from the buttons at the top of the map area.
- Next, click a spot in the map area with your mouse and drag the mouse to draw your rectangle.
- After you have the shape of your rectangle release the mouse and the grid points will be moved to fit inside the area you have defined.
- You can then click the start heat map button to begin your heat map search.
