GMB API Setup

Prerequisites to Setting up your GMB API

1. Make sure your email contains your business’s domain (firstname@businessdomain, or developers@businessdomain, either one will work.)

2. On your Business GMB, have the following:

a.) The same business name as is on your business website (exact match)

b.) Images of you, a screenshot of your business license or DBA, and a few images of your workspace. 

c.) Your Business Website

d.) **Note: If your GMB doesn’t have these images, do not proceed until you have added them. Google seems to be ignoring applications that come with GMBs that DO NOT have such photos.

How to Create Your Business Profiles API Project in Google Cloud

1. Open a google account with an email address that has your business/agency domain after the @ symbol. We’ve found it works best with Google Workspace, but we have had a few others be approved. (ie. name@yourbusinessdomain)

a.) **Note: Don’t delete this account or attempt to switch away from Google Workspace if you started there, as you will lose the GMB API project that you’ll have set up and gotten approved.**

b.) If you go the Google Workspace route, you can do the 6 dollars per month plan without an issue.

2. Go to cloud.google.com
3. Create a new project. Note the project id and project number, you’ll need them later.
4. Add a billing account and connect it to the project you just created. You don’t need to activate your cloud account, just connect the billing account.
5. Fill out the Google My Business Form

6. Google will respond with 1 of 2 emails:

a.) Request for Confirmation (that you submitted an application for approval for the GMB API)

b.) “More Questions” Email (if you don’t get this one first, it will come after you respond “yes” to the “Request for Confirmation” email).

Here’s how we recommend answering Google’s questions

After you get Google My Business Approval Email:

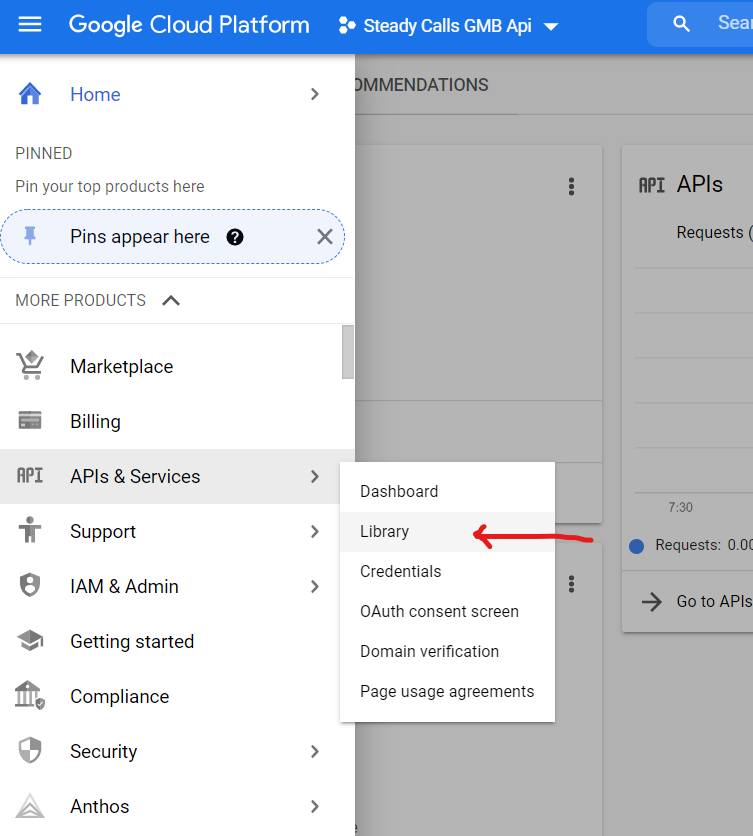
Step 1: Enable Libraries for GMB integration

Search for the following libraries and click “Enable”:

– Google My Business API

– Business Business Information API

– Business Notifications API

– Business Account Management API

– My Business Verifications API

– My Business Q&A API

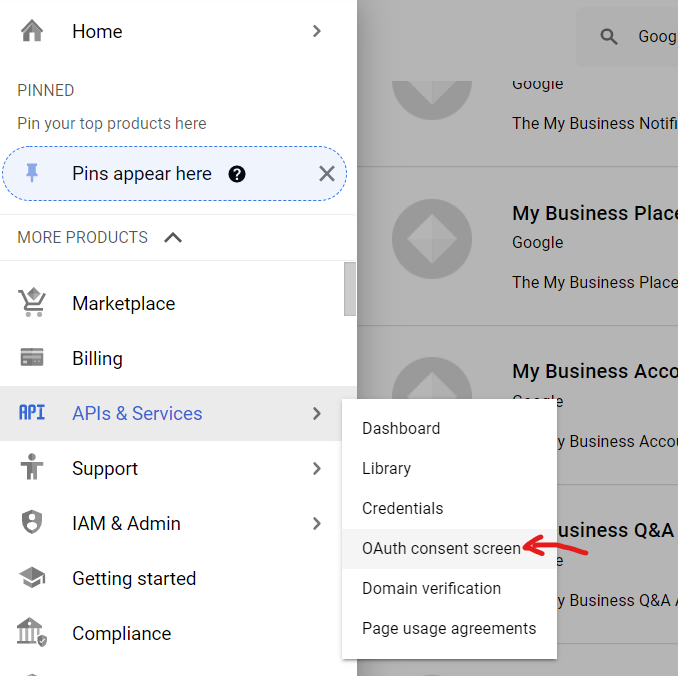
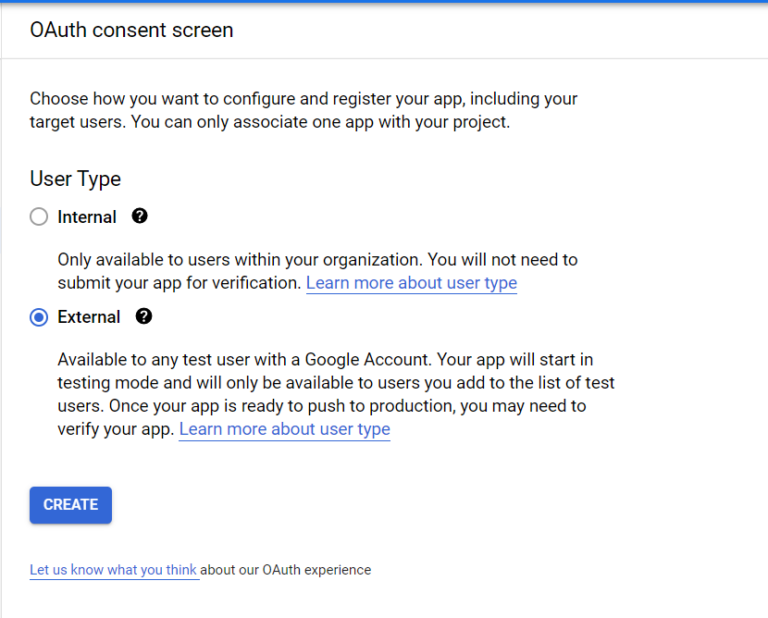
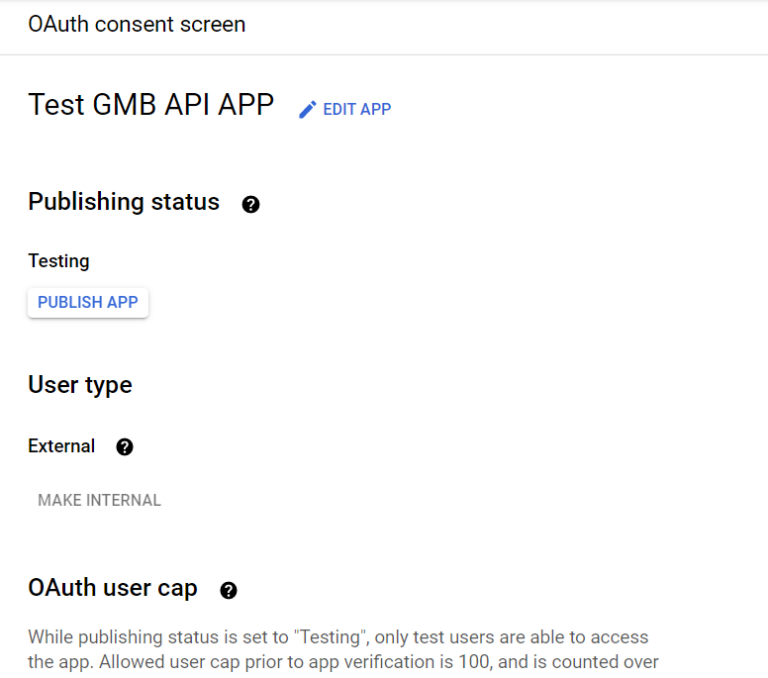
Step 2: Setup OAuth consent screen

–  Select User Type as “External” then click “Create”

–  Enter App name then select user support email from dropdown

–  Add the following Authorize domains

leadgenerated.com

Also user’s add white label domain (example: whitelabeldomain.com)

–  Enter your name@bizdomain email in the developer contact information field. Then click “SAVE AND CONTINUE”

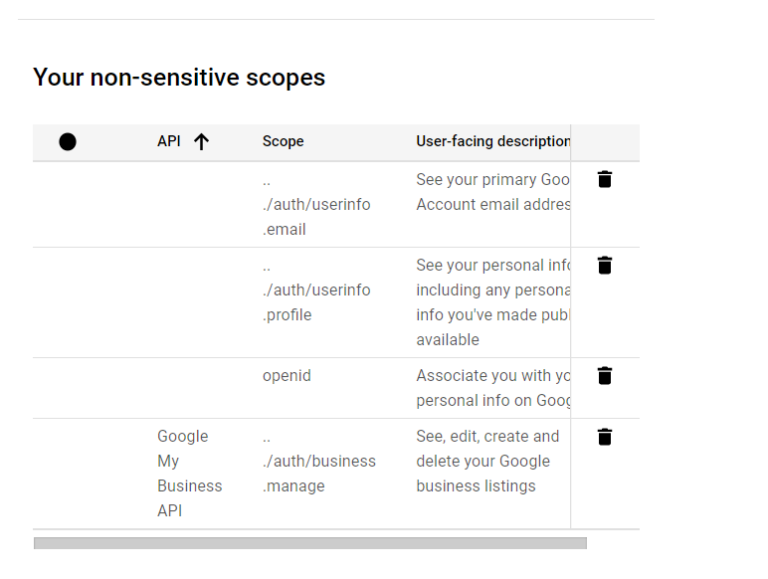
–  Click “ADD OR REMOVE SCOPES” button then select the following scopes and “SAVE AND CONTINUE”

–  See this video https://nimb.ws/Bh2Lmy

–  Test users section: Just click “SAVE AND CONTINUE”

–  SUMMARY Section: Click “Go back to dashboard” button

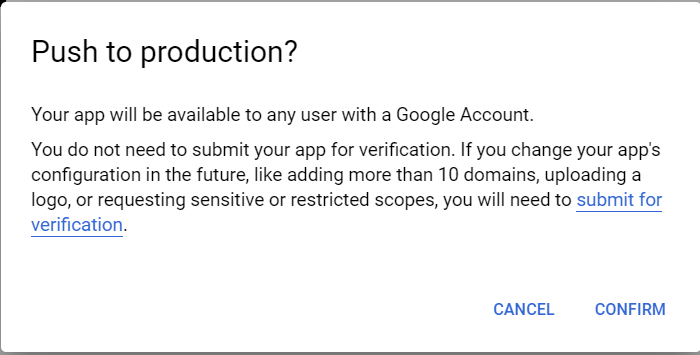
–  Click “Publish App” button and click “Confirm” on pop up

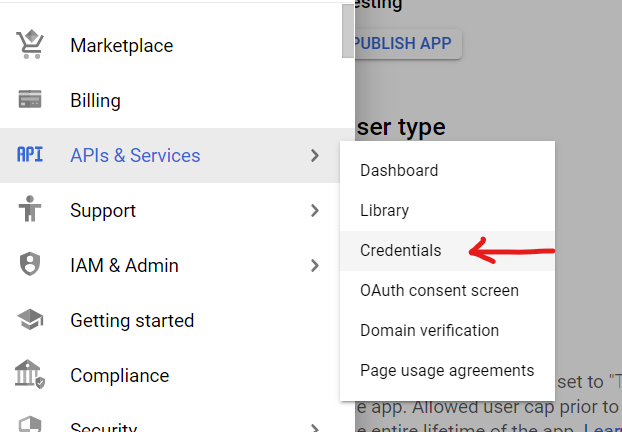
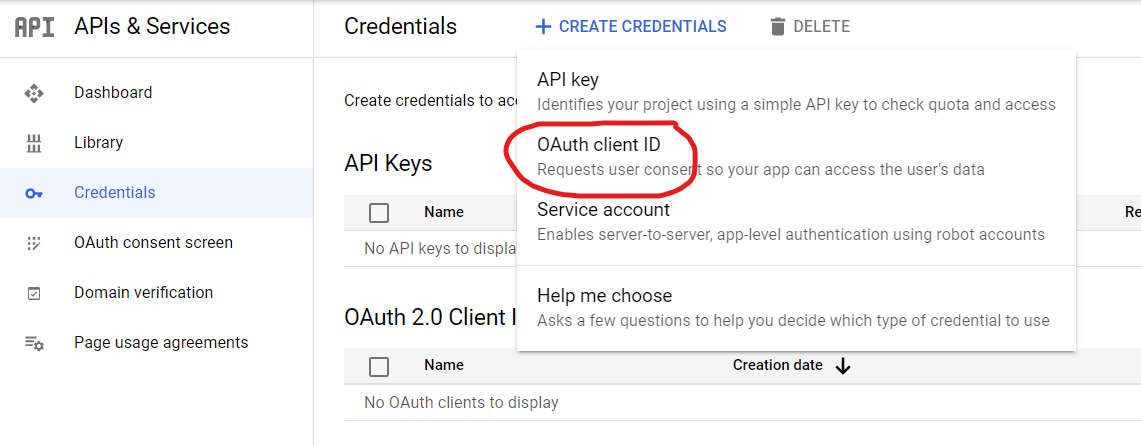
Step 3: Setup Credentials

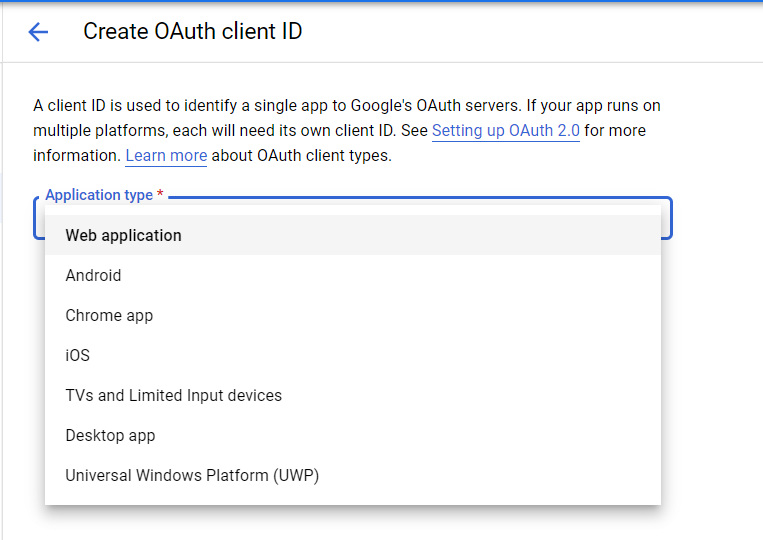
Click “Create Credentials” and select “OAuth Client ID”

Select Application type as “Web Application”

–  Fill up the name field (We usually put the name of the company followed by “Client ID” example: “Company Client ID”)

–  Add the following “Authorized redirect URIs”

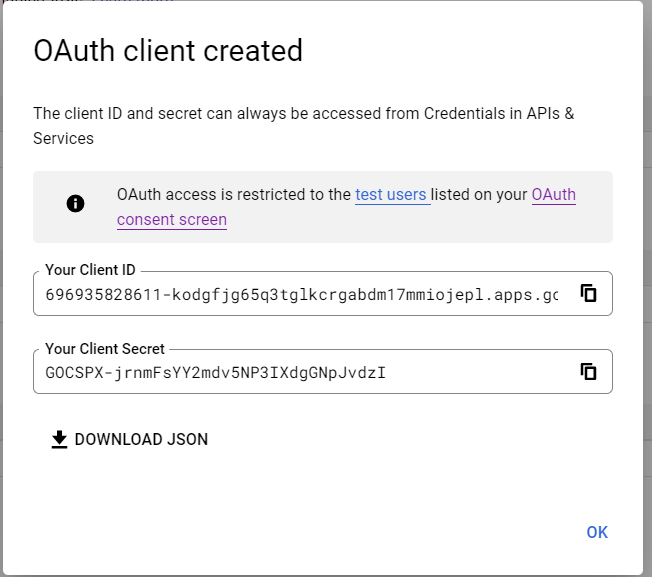
–  Click “Create”. Then a pop up will appear where you can copy the “Client ID” and “Client Secret”. Update the values also in notion.

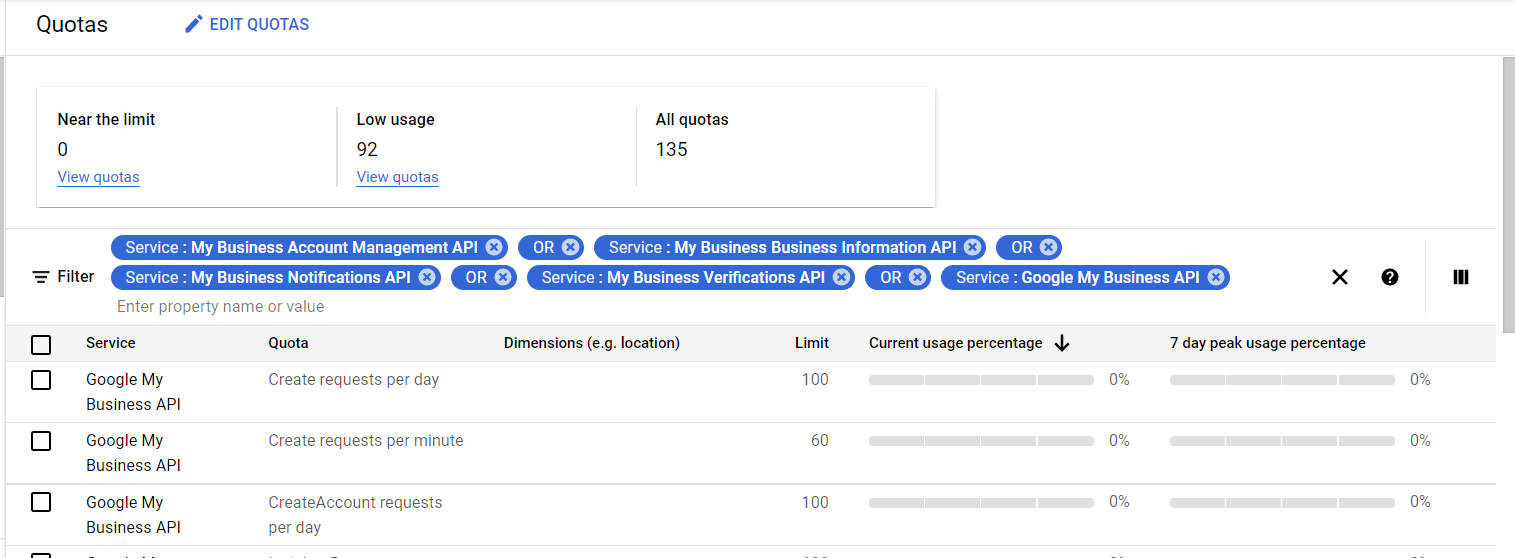
Step 4: Check Quotas

–  Go to quotas page and check the limit for the following services

Step 5: Setup Pub/Sub for Notifications

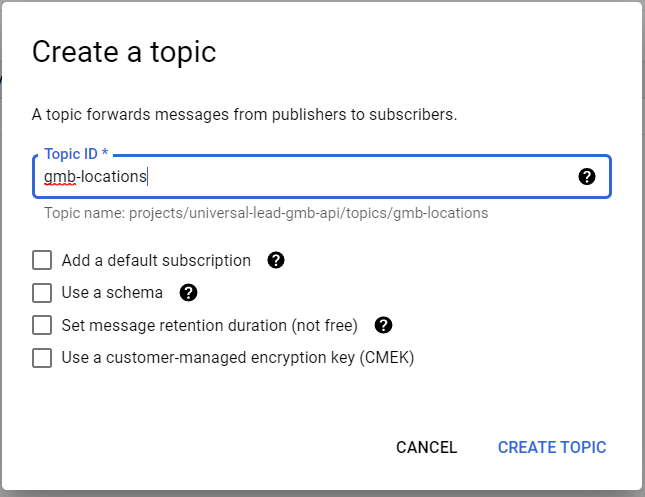
–  Go to Pub/Sub page and create a Topic

–  Set the topic ID to “gmb-locations”. Then click “Create Topic”

–  Edit topic

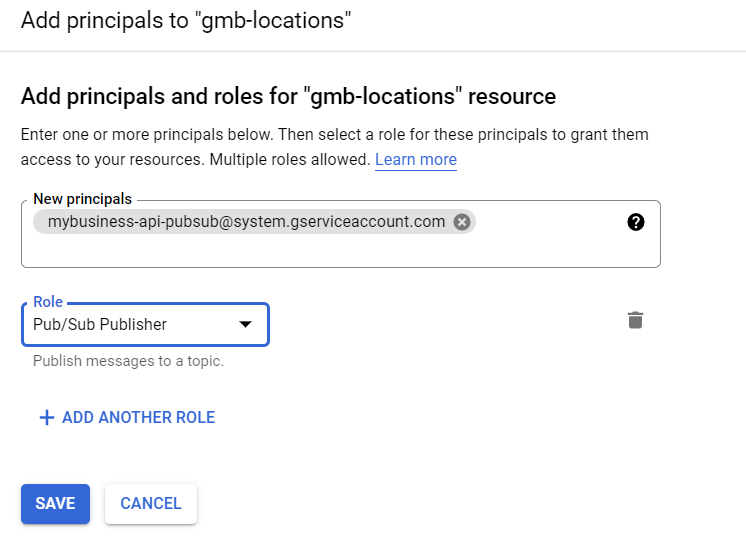
–  On the permissions section click “Add Principal” and add the following:
[email protected] – Pub/Sub Publisher

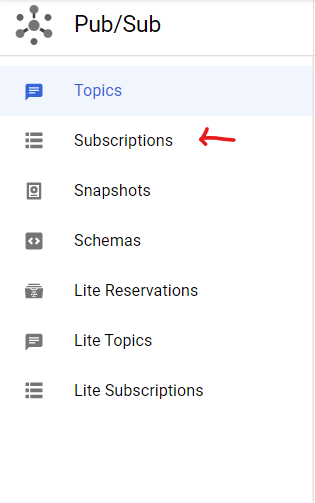
–  Go to Pub/Sub(Subscription) page

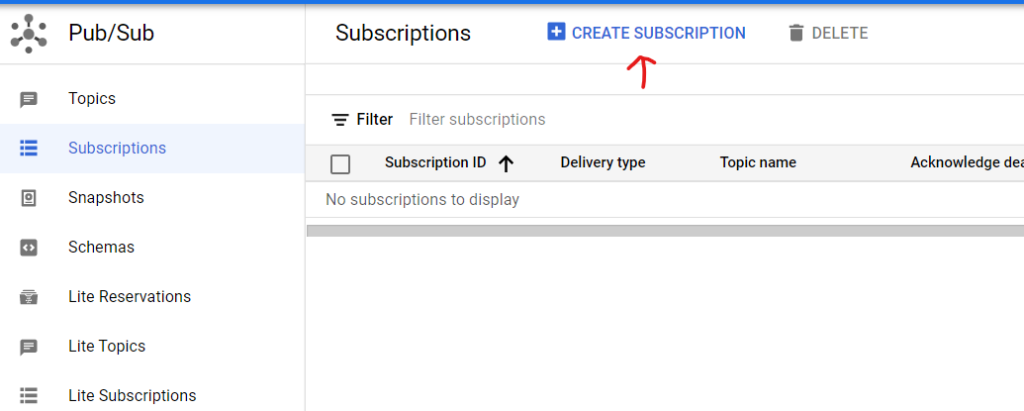
–  Click “Create Subscription”

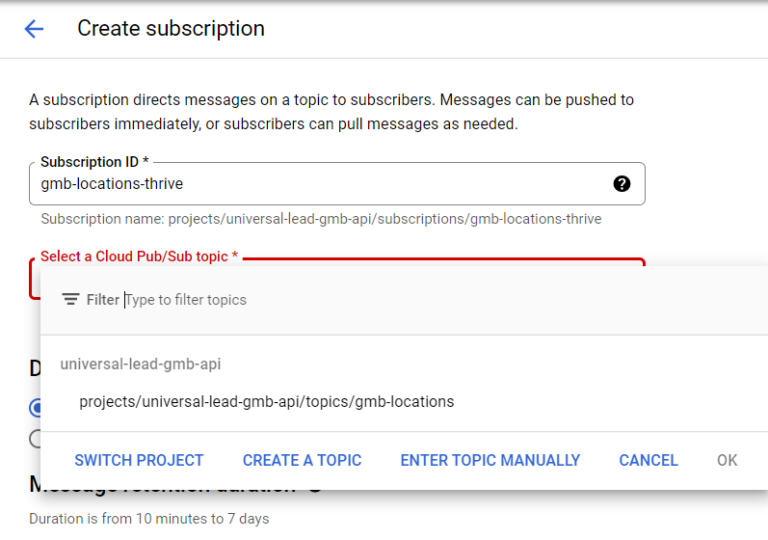
–  Enter subscription ID: gmb-locations-
gmb-locations-leadgenerated

–  Set Delivery type as “Push” and enter endpoint url as:
<server_domain>/pubsub/google/notification

https://app.crmthrive.com/pubsub/google/notification
https://app.leadgenerated.com/pubsub/google/notification

–  Set expiration period to “Never Expire”

–  Select Retry after exponential backoff delay. Then Click “UPDATE”

–  After creating 3 subscriptions. One for each server. You should see this:

Step 6: Add keys to user’s account

–  Login to the app(LS or LG)
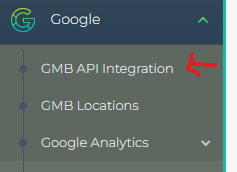
–  Got to “GMB API Integration” under Google

–  Click add integration button

–  Enter the name (example: Company GMB API)

–  Paste the “Project ID”, “Client ID” and “Client Secret” and click save.
Note: make sure that the project id is from here:

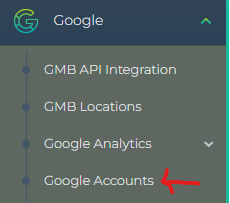
–  To test if the setup is working. Go to “Google Accounts” and add one of your GMB accounts.

–  If it gets added without any issues then integration is completed.

Phone System Overview

The LeadGenerated Call Tracking System is a cloud-based phone system that enables tracking for both calls and text messages within your business. It also allows you to build custom workflows based on your business needs. We offer local numbers—-often referred to as “tracking numbers”—in various countries around the world. The interactions that take place on these local phone numbers can be forwarded to your local phone or managed through the browser window when logged into your account.

The functionality of the LeadGenerated phone system is limited to numbers that have been purchased within LeadGenerated. Your LeadGenerated account subscription comes with one phone number. To get started, just select the local phone number you would like.

The LeadSnap Call Tracking System is a cloud-based phone system that enables tracking for both calls and text messages within your business. It also allows you to build custom workflows based on your business needs. We offer local numbers—-often referred to as “tracking numbers”—in various countries around the world. The interactions that take place on these local phone numbers can be forwarded to your local phone or managed through the browser window when logged into your account.

The functionality of the LeadSnap phone system is limited to numbers that have been purchased within LeadSnap. Your LeadSnap account subscription comes with one phone number. To get started, just select the local phone number you would like.

Call Flow System

The Call Flow System allows you to build custom workflows based on your business needs. There is no limitation on the number of steps you can add in the call flow sequence. Check out the call flow support article for a deeper dive into how these work.

● Record Calls – By default, LeadGenerated will record calls. You can turn this off using the switch shown in the first step of your call flow. Those calls are available for review within the calls section of LeadGenerated.
● Greeting – Play a recorded message or have our automated system read text to the caller when they reach this step.
● Dial – Send a phone call to a designated number (or numbers) when the call arrives.
● Round Robin – Rotate the destination of the phone calls to various numbers based on weighted percentages that you decide.
○ Example: Send 70% of phone calls to these two numbers and send 30% of phone calls to this other set of numbers.
● Menu – Allows the caller to press a button and get routed to a destination phone number.
○ Example: Press 1 for sales, press 2 for support.
● Schedule – Allows for different actions based on the time of day when a phone call arrives.
○ Example: Send calls to phone number A on weekdays from 8:00 am to 5:00 PM and send phone calls to phone number B during other time periods.
● Tags – Tag a phone call with a certain tag that can be used to organize calls in the system.
○ Example: If the user presses 1 for sales, you can tag a call as a sales call.
● Voicemail – Play a recorded message or have our automated system read text to the caller when they reach this step. If you choose to use a voicemail, this will be the final step in the call flow sequence.
● Hang Up – End the call.

Automations

The phone system plays a strong supporting role for the automation functionality. Automations can be triggered by both phone calls and text messages. Text messages can be used as an action within the sequence.

Calls

In the calls area, you will find the call history for each of your tracking numbers. Any calls that have been recorded can be played back from the calls screen. You can use the filters at the top to limit the calls showing based on your own custom criteria. Check out the calls documentation article for more information.

Texts

Using your tracking phone numbers, you can send and receive text messages throughout the LeadGenerated system. Texting options appear on the lead detail screen, the calls screen, the text screen, tasks, contacts and within the automations area as both actions and triggers. In addition, you can set notifications to be sent via based on your own custom criteria. Notifications and other system messages will come from the phone number set as the default SMS number within your account.

Browser Phone

You can make and receive phone calls through the browser. You’ll be required to allow microphone access to LeadGenerated if you would like to take advantage of the browser phone. Throughout the system (lead details, contacts, calls, texts) you will see several options that say “dialer.” Calls can be made through the browser from any of these locations. In addition, within the phone system you will notice there is a browser phone option.

Outgoing Phone Calls:

Making an outgoing call through LeadGenerated can happen either through the browser or through a local phone. In either case, the call will be made from the tracking phone number. If the person you’re calling is using caller ID, they will see the tracking phone number instead of your phone number.

Make Outgoing Phone Call

1. Select the company from which you would like to call from. You must have a tracking number within our system associated with this company to make an outgoing call.

2. Select the associated tracking number from the tracking number dropdown.

3. Enter the phone number of the customer you would like to call.

4. You will notice there is a “connect with your phone” checkbox. If you choose this option, then our phone system will first call your phone number. You will hear a recorded message asking you to press 1 to connect to the phone number specified. Once you press 1, our phone system will connect the call.

Phone Plans

Currently we have two types of plans—the plan that only includes the tracking phone numbers, and the plan that includes tracking phone numbers as well as all of the other functionality of the LeadGenerated CRM. The latter comes with one free phone number, you just need to select your local area and activate it. Depending on the country you are in, the costs for minutes and phone numbers can vary. The pricing also varies depending on the plan that you choose, with the higher level plans providing bulk discounts for both numbers and minutes.

Edit Phone Number

1. Expand the Phone System item from the left navigation.

2. Expand Numbers from the submenu within the Phone System item.

3. Click All Numbers.

4. Click Edit next to the number you would like to edit.

Company – This is where you’ll assign the current number to a different company within LeadGenerated.
Number Name – A nickname for the phone number.
Forward Calls To: – Enter the default phone number where you would like forward incoming calls placed to your tracking number.
Call Whisper – This turns on and off the whisper message for the receiver of the call.
Whisper Message – A message heard by the receiver of the phone call when they answer the call. The caller will not hear this message. From the caller’s perspective, the phone will continue to ring until the whisper message has been completed.
Use Call Flow – This allows you to choose if you would like to use a Call Flow for incoming calls or have the call forward directly to a phone number without the call flow work flow.
Call Flow Selection – Select the Call Flow that should be used by this phone number for incoming calls. Call Flows are implemented at the company level, so if you do not have one for a company, you can create one and then assign it to a phone number.
Call Recording – This turns on and off call flow recordings. If turned on, incoming calls will be recorded. This option is only available if Call \Flows are disabled. This will enable recording of incoming phone calls. If a call flow is selected, this option is handled from within the Call Flow.
Call Greeting – When turned on, our system will read an automated message to the caller of incoming calls. You can specify the message to be read in the text box. This text box will only be visible if the switch is enabled for call greeting. Thiscall greeting option is also only available if Call Flows are disabled. If a Call Flow is selected, this option will be handled there.

Port Number

Call porting allows you to import your tracking phone numbers from other carriers into LeadGenerated. By law, every carrier is required to allow phone numbers to be ported out of their system. Once you have ported a phone number, you will no longer have financial responsibility to the previous carrier. It may be necessary to inform this carrier to cancel service on the phone number. Please ensure the phone number is within LeadGenerated and functional before making this request.

Port Number Steps

1. Expand the Phone System item from the left navigation.

2. Expand Numbers from the submenu within the Phone System item.

3. Expand Port Number.

4. Select New.

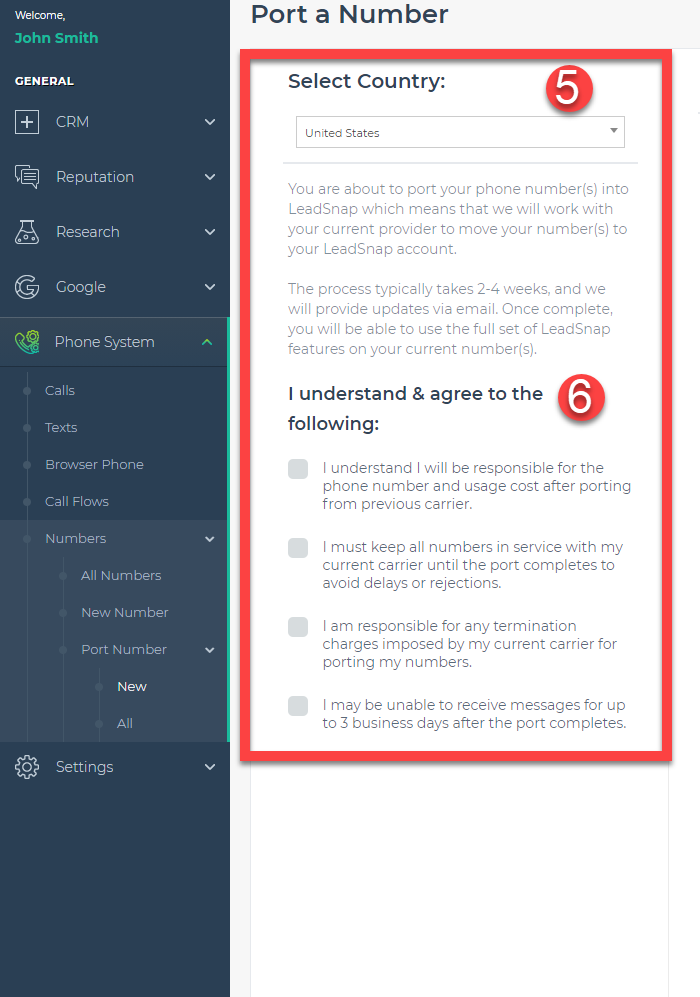
5. Select the country from the drop down menu.

6. Agree to the terms through the checkboxes.

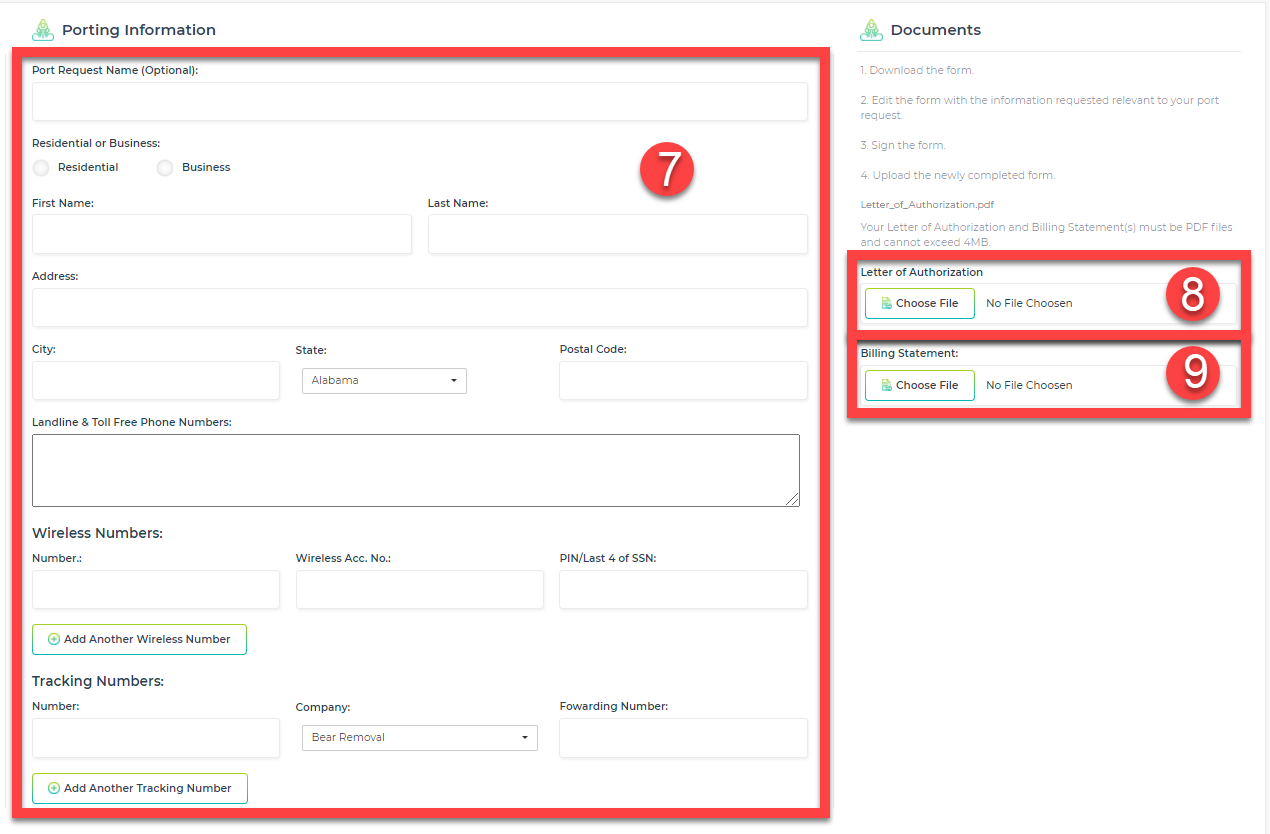
7. Complete the form with your phone numbers. Use the address on file associated with the current carrier where you will be porting the phone numbers from.

8. Provide the signed letter of authorization.

9. Include a billing statement from your current provider.